
Watch this video tutorial on how to setup your receipts printer.
You must be logged into the Admin Panel to set up a receipt printer.
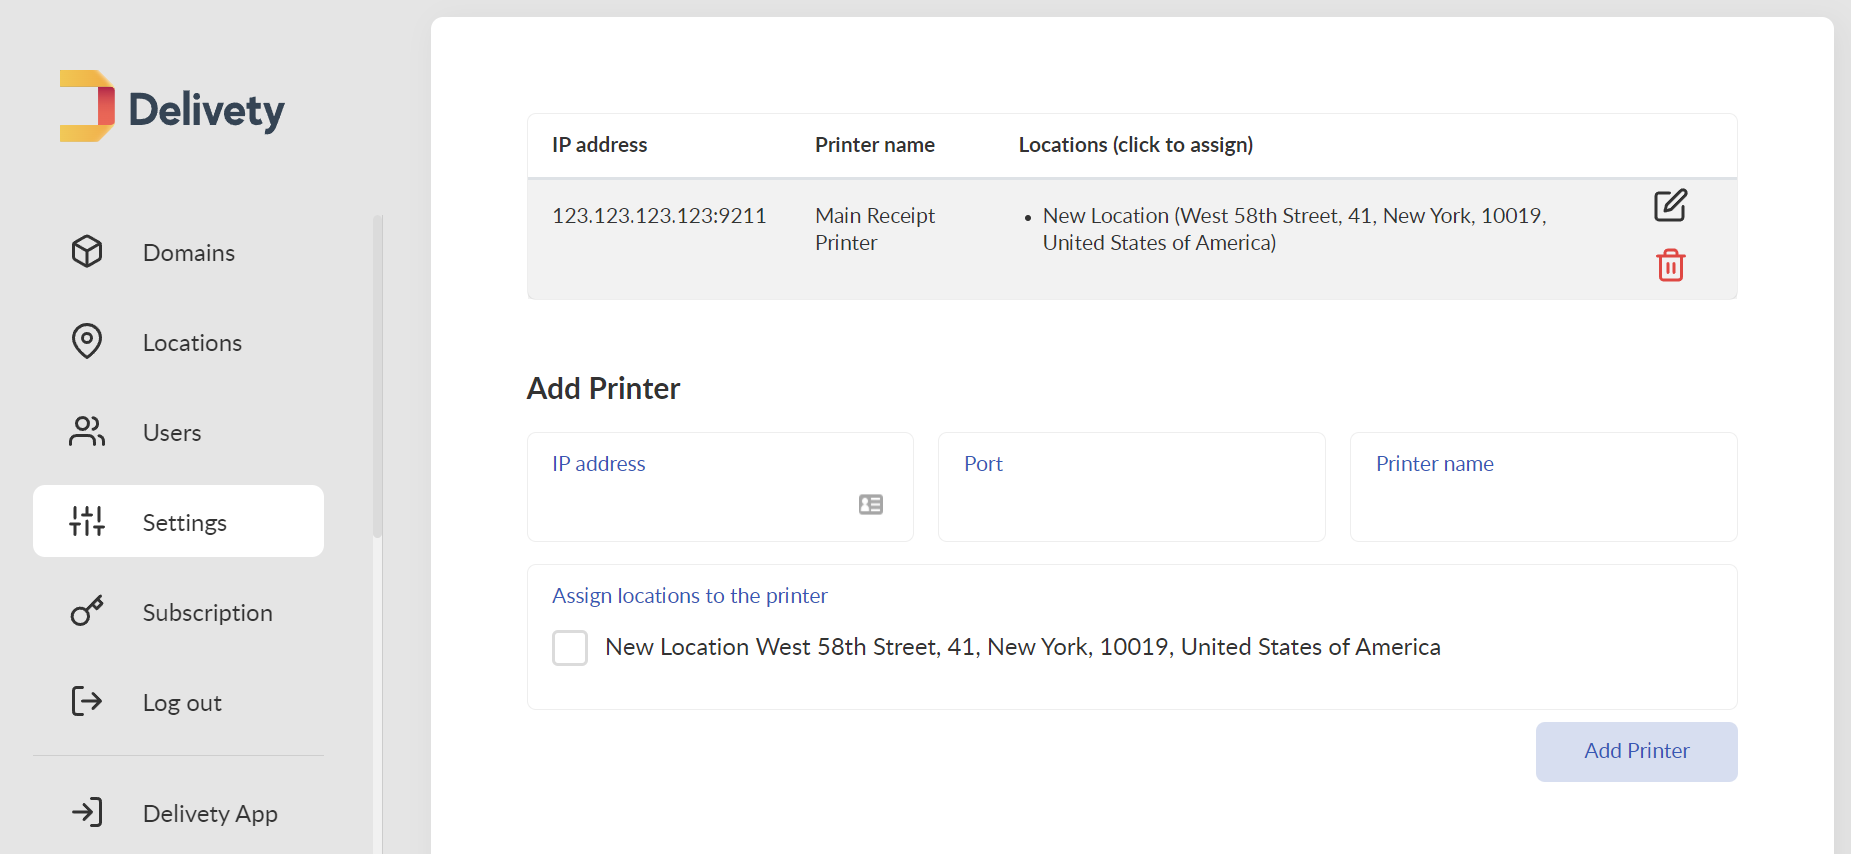
Select Settings on the left and click on the Printer Manager section. Type in the IP address* of your receipt printer and its port number**, then assign the printer name (“Main Receipt Printer”, e.g.) and click on the Add Printer button. The printer will appear in the PRINTER MANAGER section and you will be able to print the receipts now.
_______________
* Printer IP address is the public IP address of your printer. The public IP address is an IPv4 address that is reachable from the internet. You need a static IP address to reach your printer without changing its IP address each time you get a new IP address. Ask your network administrator or Internet Service Provider (ISP) for assistance if you don't have a static IPv4 address. You will also need to forward your printer’s port through NAT forwarding of your router to make it accessible from outside of your local network. Contact us if you need any help with your printer setup.
** The most common destination printer ports are 2501, 3911, 5001, 9100, 9101, 9102, 9211 and 9600; however, some printers could use other ports. Refer to your printer manual or ask your network administrator for your printer port number.
Comments
0 comments
Please sign in to leave a comment.