
Watch this video tutorial on how Delivety works:
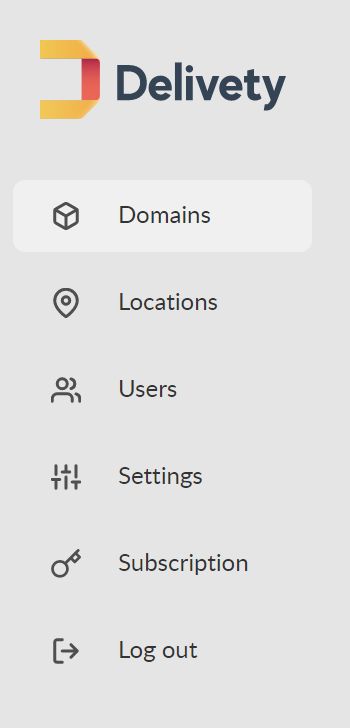
Once you have created your account with Delivety, you will be able to log into your Admin Panel (https://delivety.com/admin) with your email address and your password. Select Domains from the sidebar menu on the left. You can also follow the Setup Wizard tips accompanying each step.
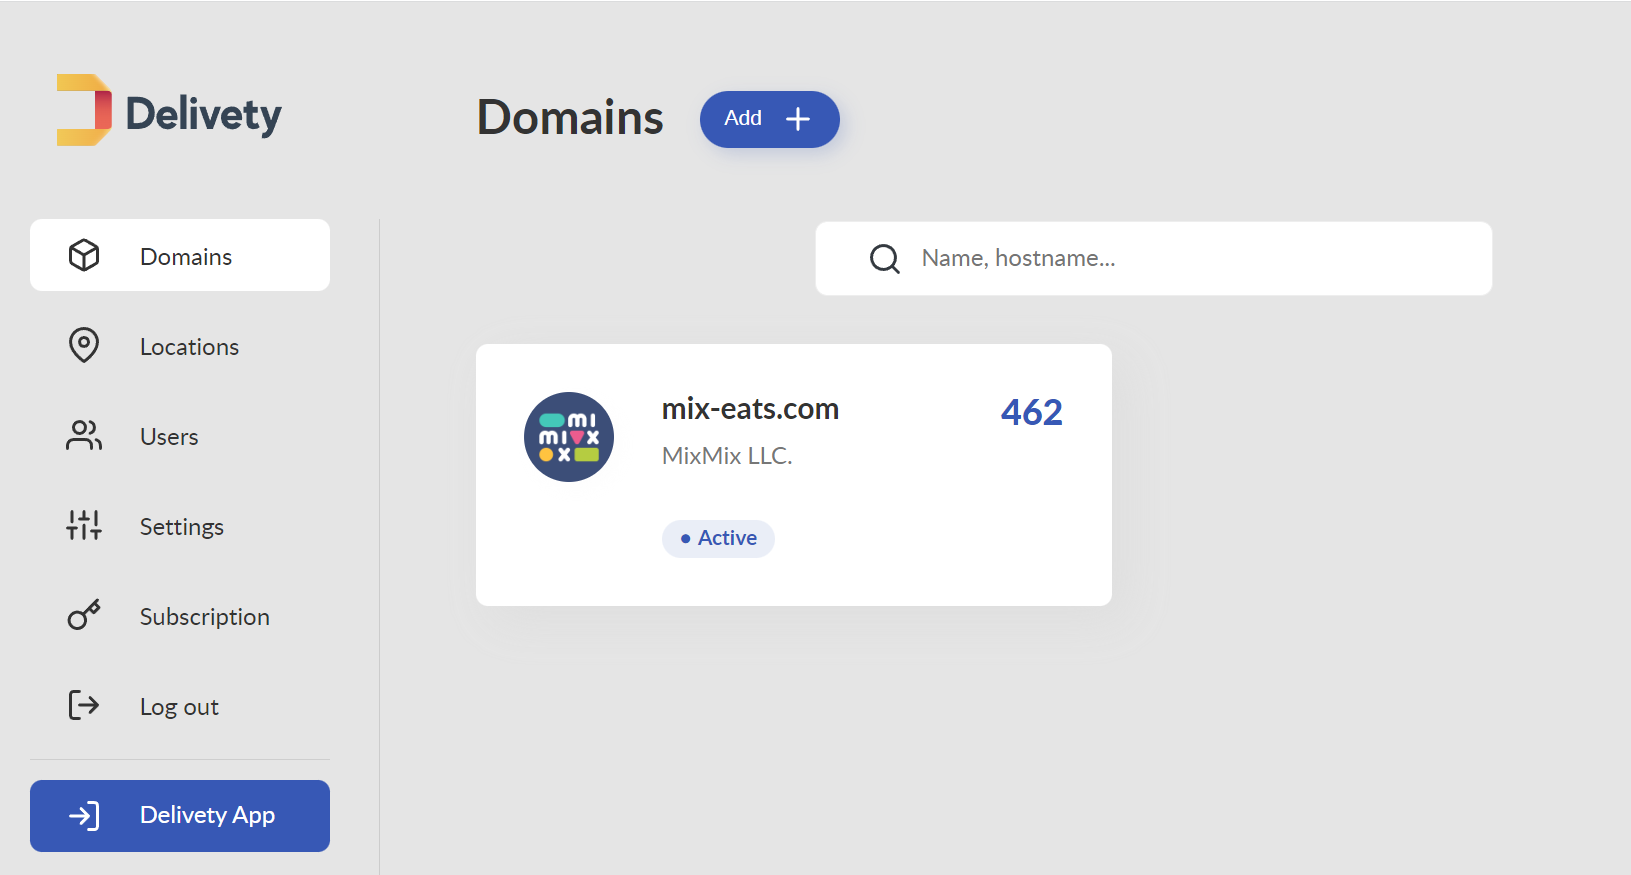
STEP 1. OPEN YOUR DOMAIN
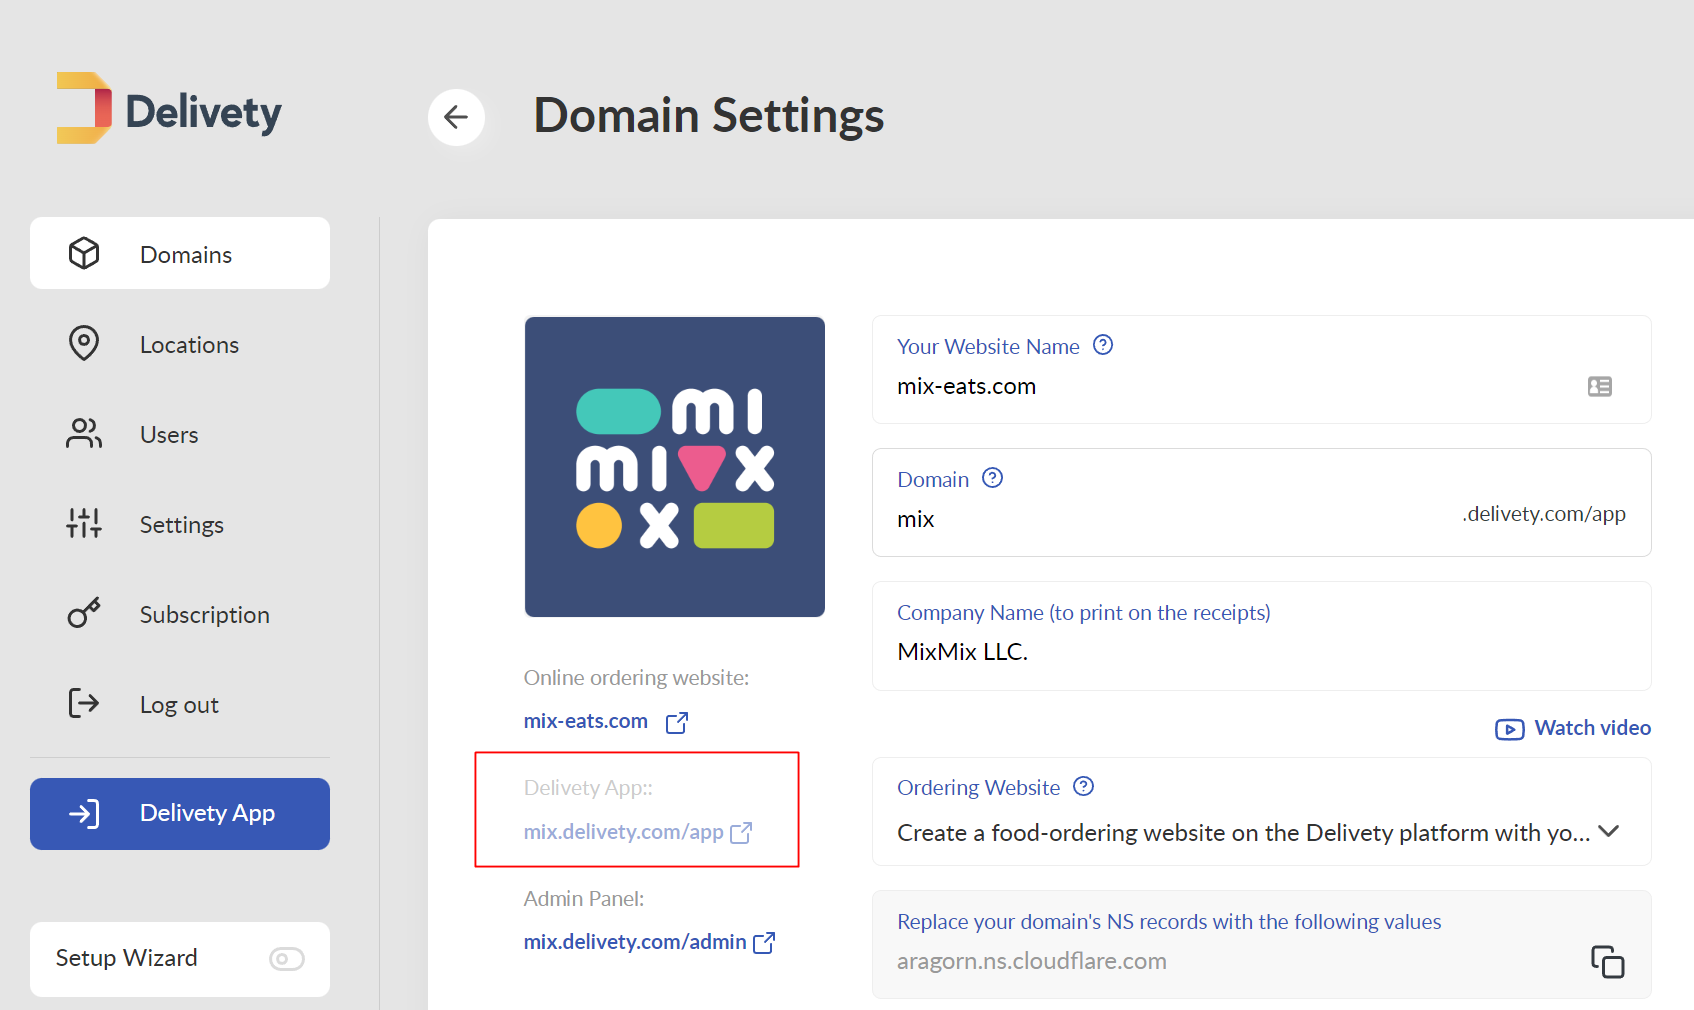
In the Domains section, you will find the domain that has been automatically created for you. It is based on the Brand Name that you have entered during the registration process. Click on it to edit its settings.
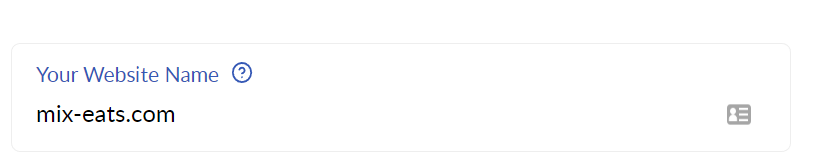
STEP 2. ENTER YOUR WEBSITE NAME
In the Domain Name section, enter your website name without the “https://”. You can skip this step if you don’t have a website (or a registered domain name) yet.
STEP 3. CHOOSE HOW YOU WILL RECEIVE ORDERS
Watch this video tutorial on how to create your food-ordering website with Delivety:
If you already have an existing ordering website and are completely satisfied with its performance (or simply not ready to change anything right now), then we recommend selecting “No website integration” at first. You can always change this later, once you are ready to integrate your website using the Delivety API.

If you don’t have an ordering website or you have one but are not satisfied with how it looks or performs, then we recommend selecting one of two last options. Both of them create a fully integrated ordering website for you, so you don't have to configure Delivety API):
The third option is to “Create an integrated food ordering website...with your existing domain name” if you already have a domain name registered. Kindly note that you will have to change your domain’s name server (NS) records if that is the case. Also, please check to see if the Domain Name is entered correctly.

The fourth option is to “Create an integrated food ordering website your-domain.delivety.com” if you don’t have a domain name registered. This is the simplest way as you don’t even have to change the name server (NS) records.

STEP 4. UPLOAD YOUR LOGO
Click on the Upload logo button and select your brand logo or the website logo. This logo will be printed on all your receipts if you choose to print the receipts with Delivety.
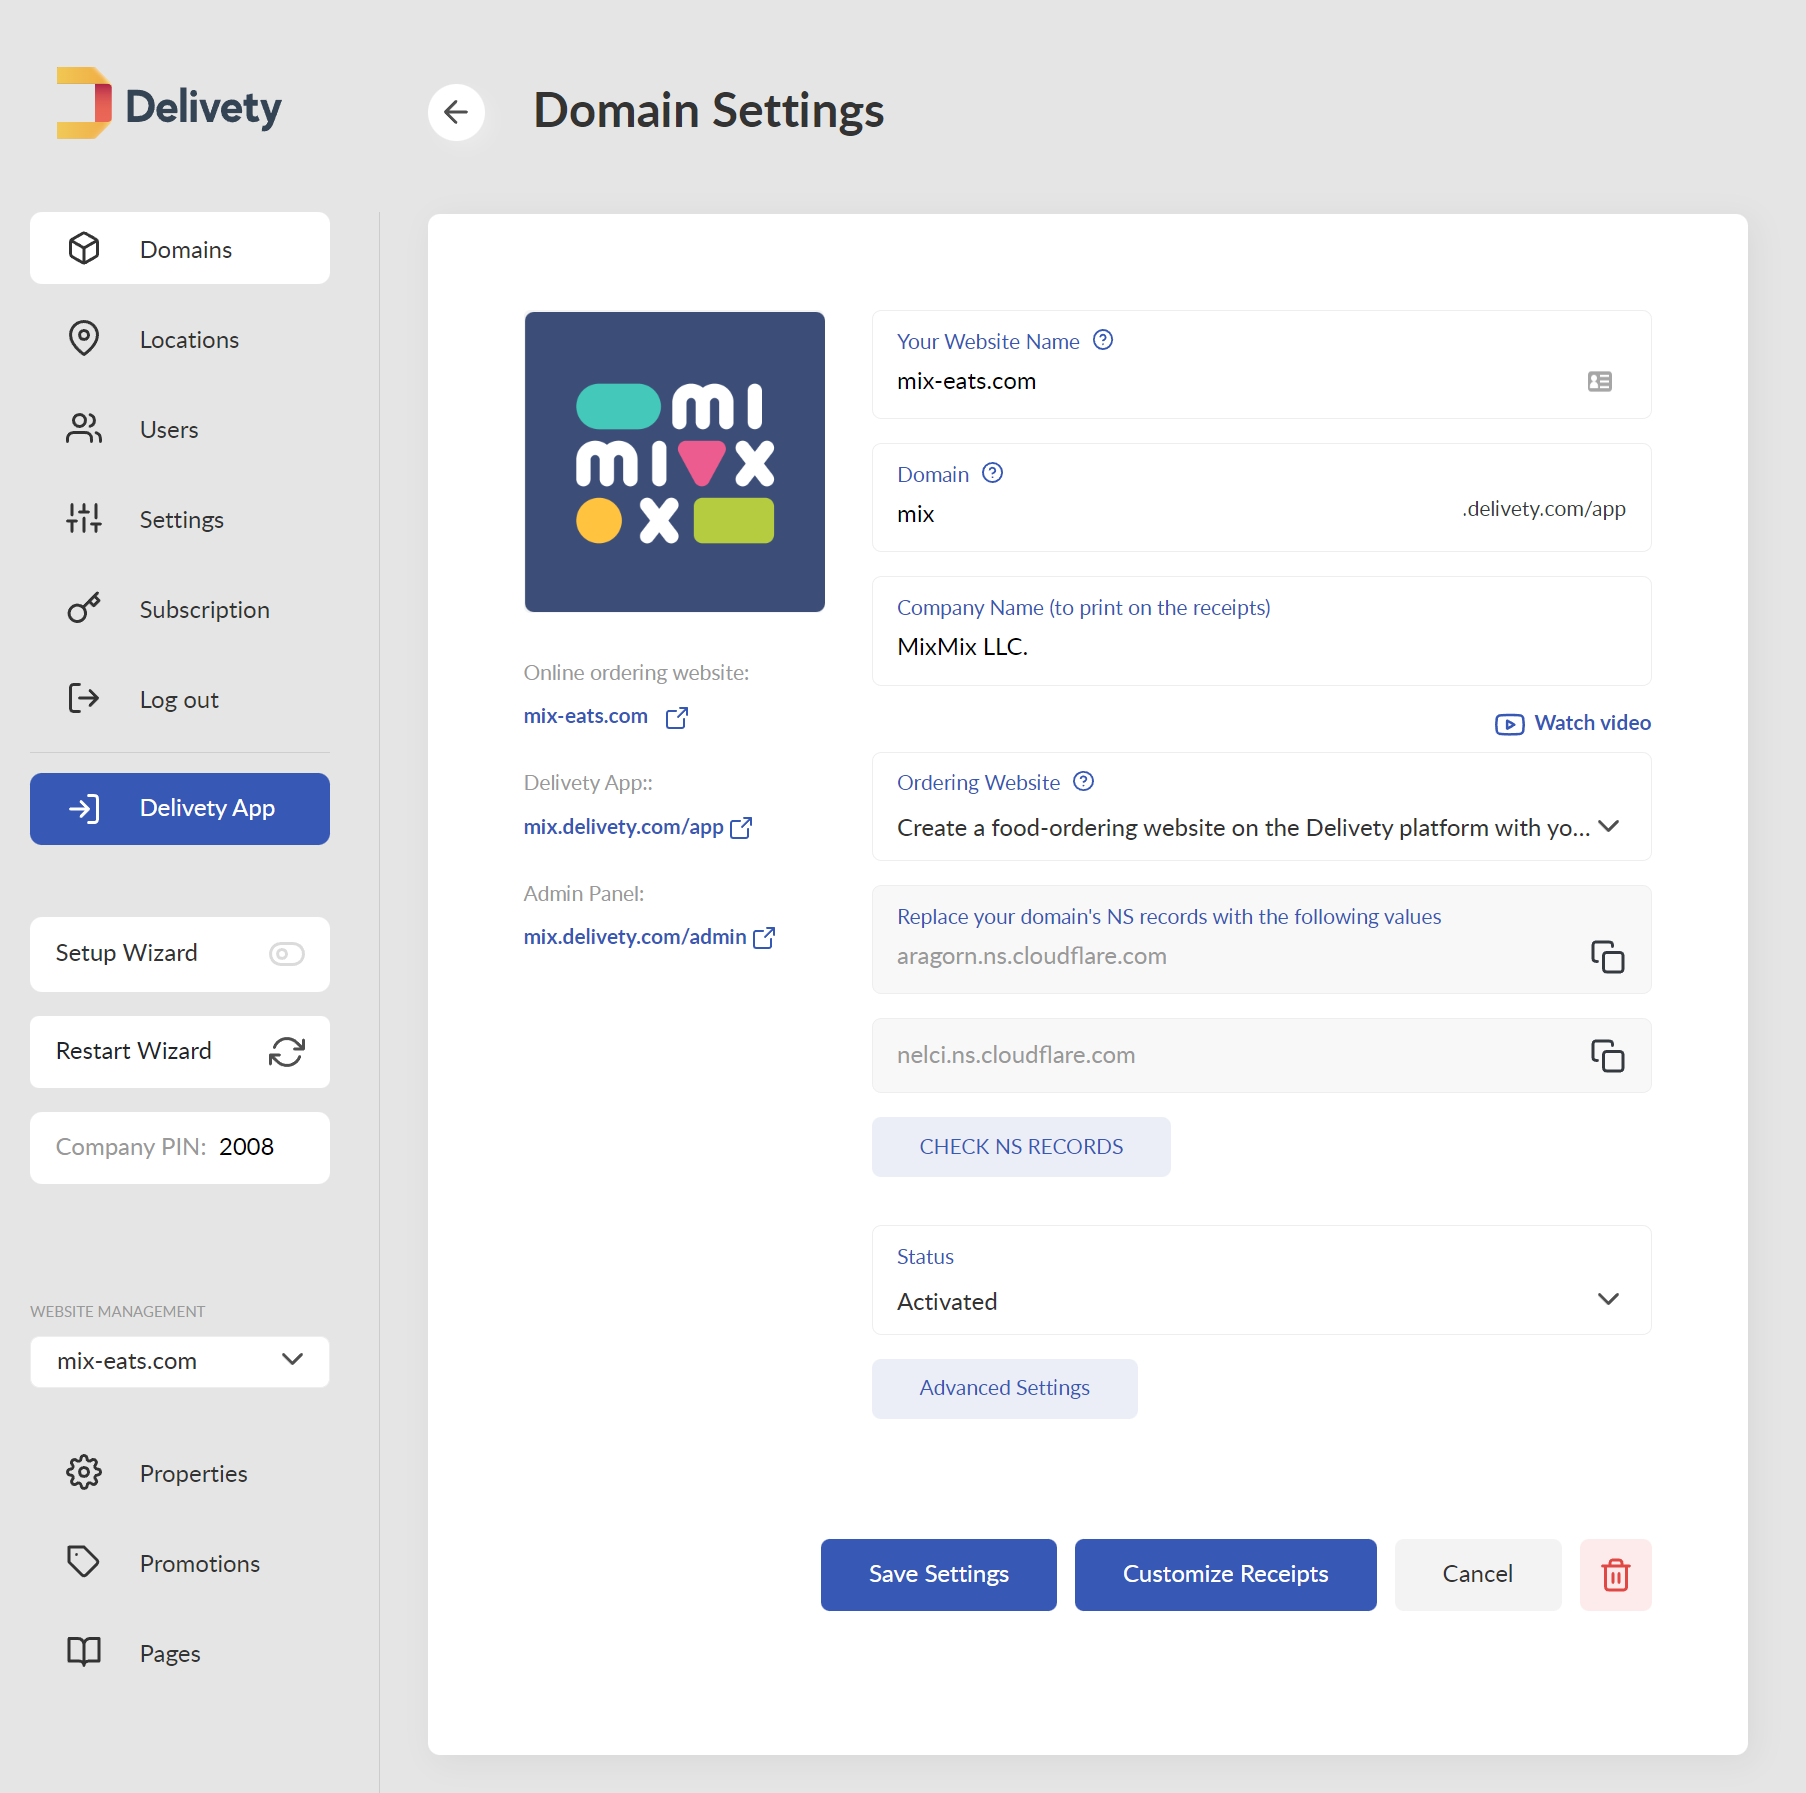
Now review your Domain Settings and click on the Save Settings button.
STEP 5. CUSTOMIZE YOUR RECEIPTS
Click on the Customize Receipts button and configure the following parameters:
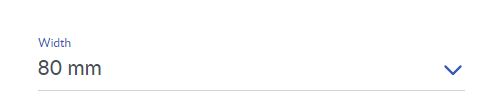
The Width of your printer’s paper (refer to your printer’s manual):
Decide if you need to print the Logo on your receipts and adjust its size:
![]()
Decide if you need to print the motto (or slogan) on your receipts and adjust its font size and weight:

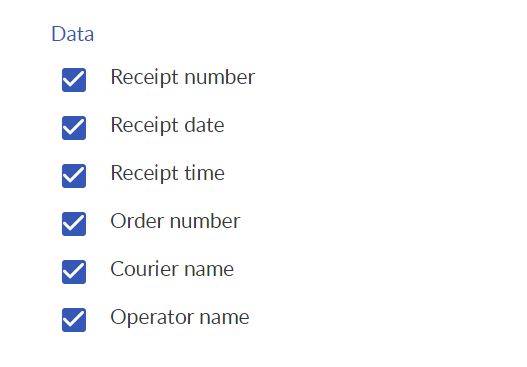
Choose which Data to print on your receipts
Decide if you need to print the motto (or slogan) on your receipts and adjust its font size and weight:
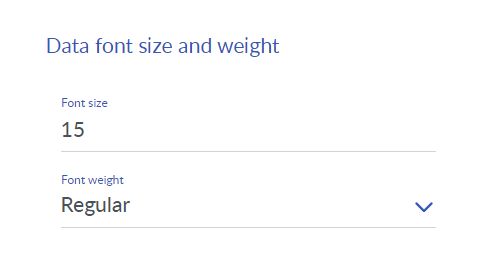
Adjust the font size and weight of other Data to print on your receipts:
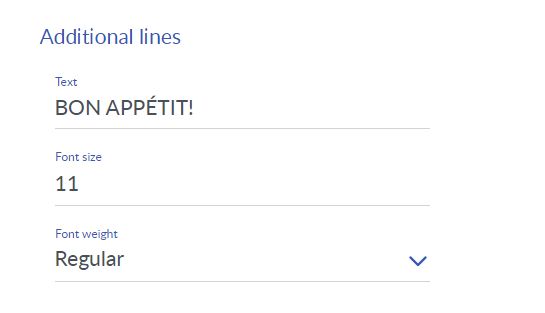
Add any other Additional lines you may need to print on your check and adjust their font size and weight:
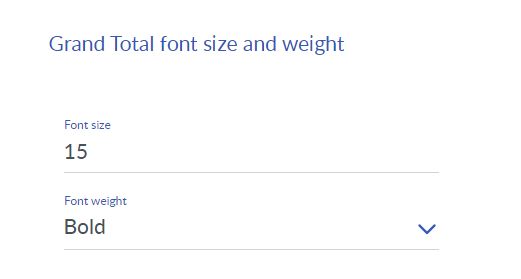
Adjust the font size and weight of the Grand Total to print on your receipts:
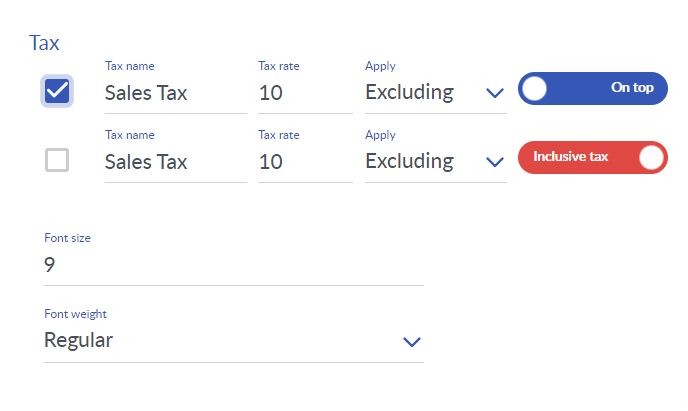
If needed, tap the Tax checkbox and set the Tax name and Tax rate. Select the dish types to exclude from taxation, if any) and tap the tax type switch to select whether the tax should be calculated on top of the Grand Total or included in it. You can also change the font size and weight of the tax calculation to print on your receipts. You can set up as many taxes as needed. Or, you can skip this step completely if you don’t need the taxes to be printed on the receipts.
Now review and close the Customize Receipts tab. All the receipt settings will be saved automatically. Also, review your Domain Settings and click on the Save Settings button.
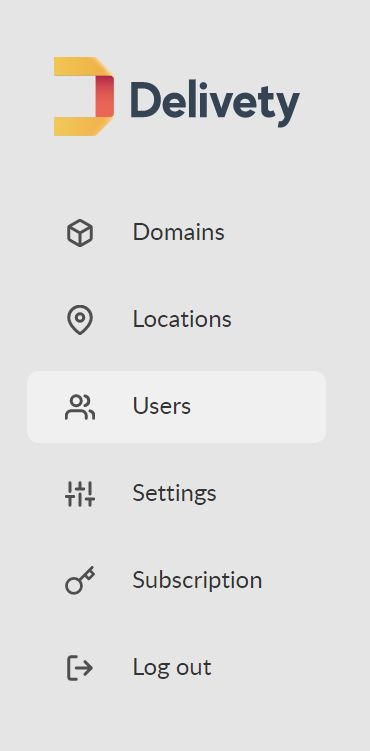
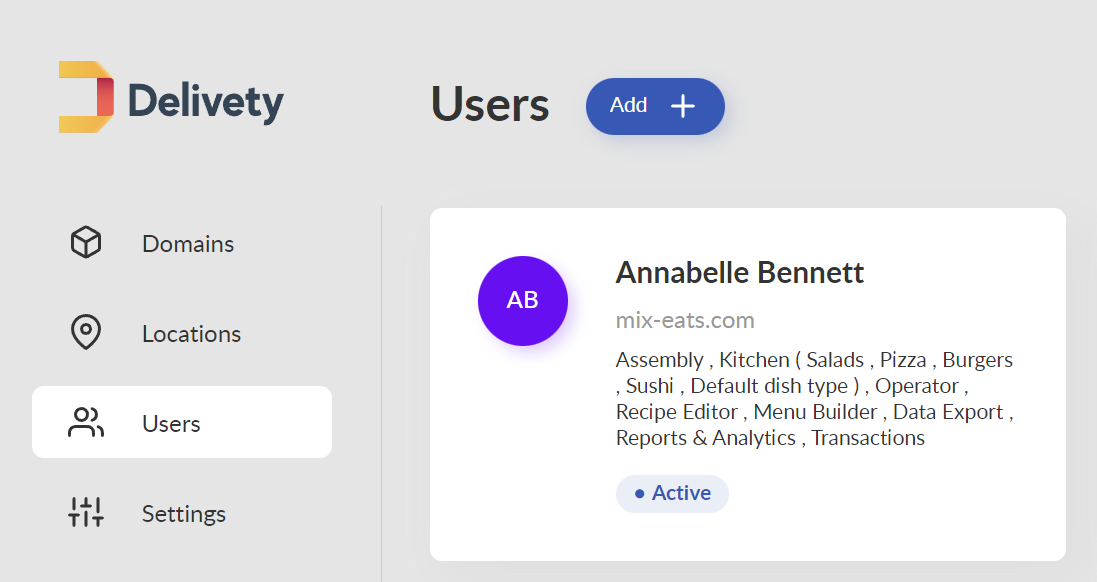
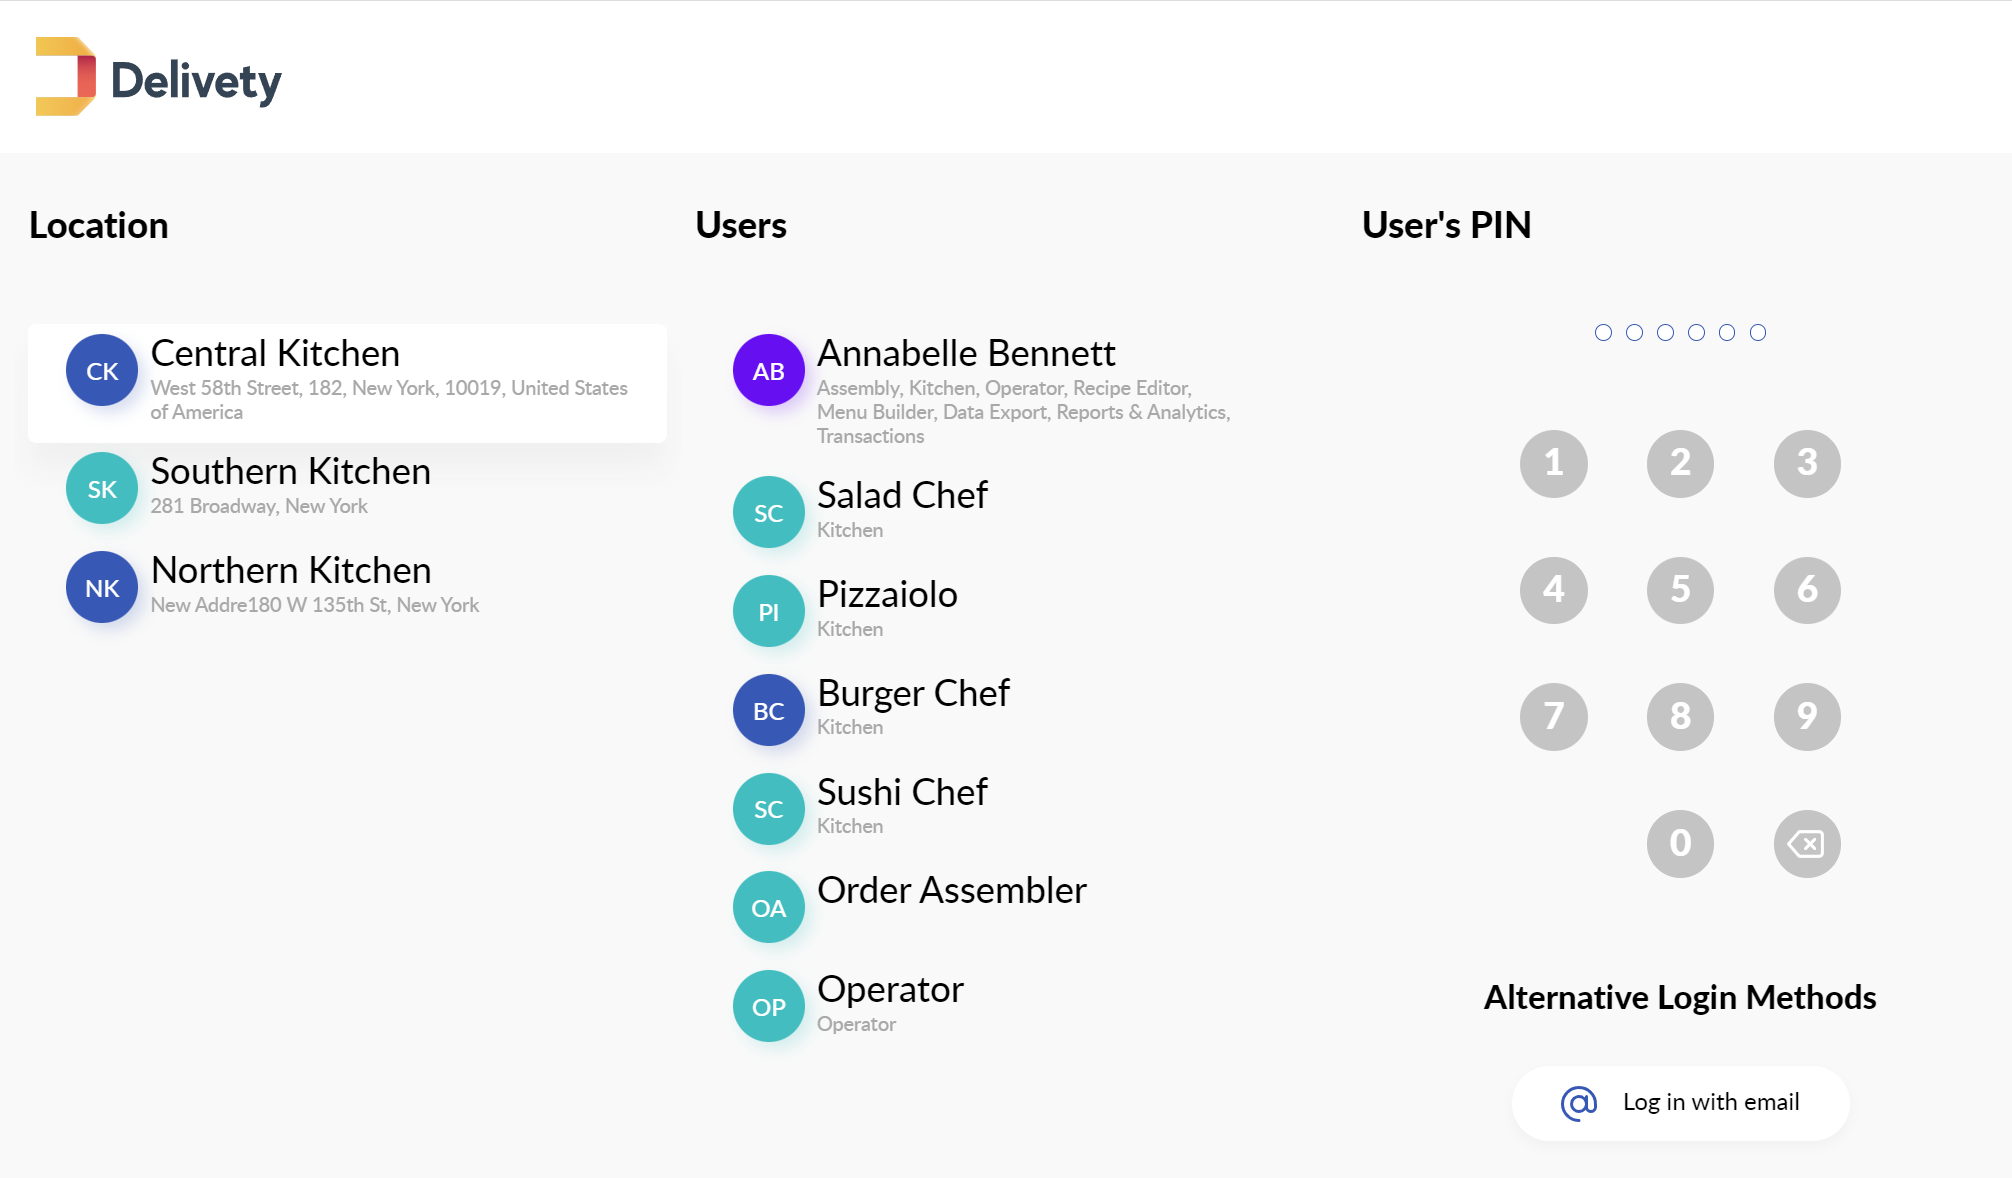
STEP 6. NAVIGATE TO THE USERS SECTION
Select Users from the sidebar menu located at the left.
STEP 7. SELECT YOUR USER
At the initial setup, your Users section contains one user only. This persona has been created automatically during your Delivety account setup process. It’s usually named after your profile name. This is your user and you can use it to access either all the Delivety Dashboards or only particular ones. Click on your user to check and edit its settings.
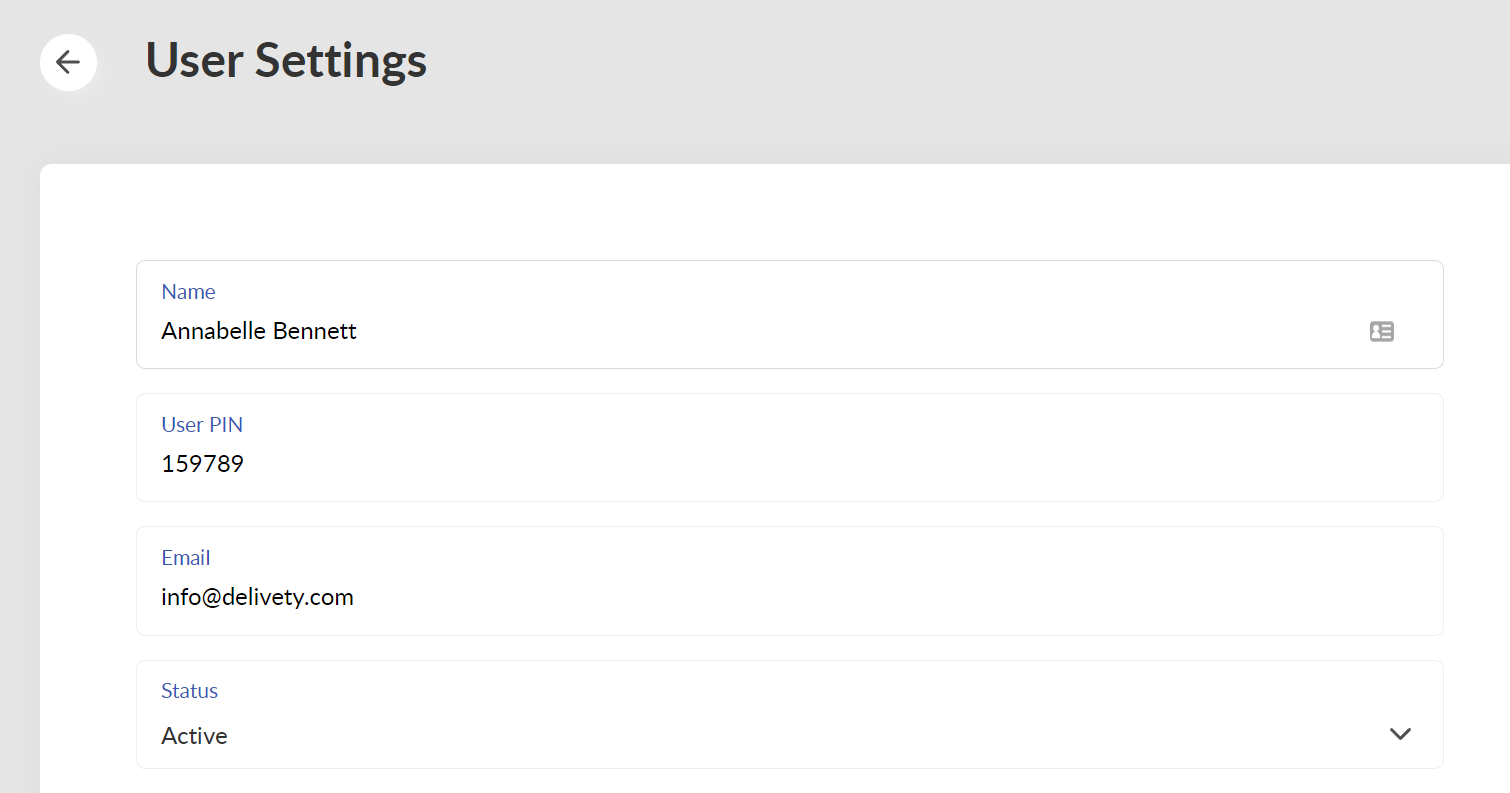
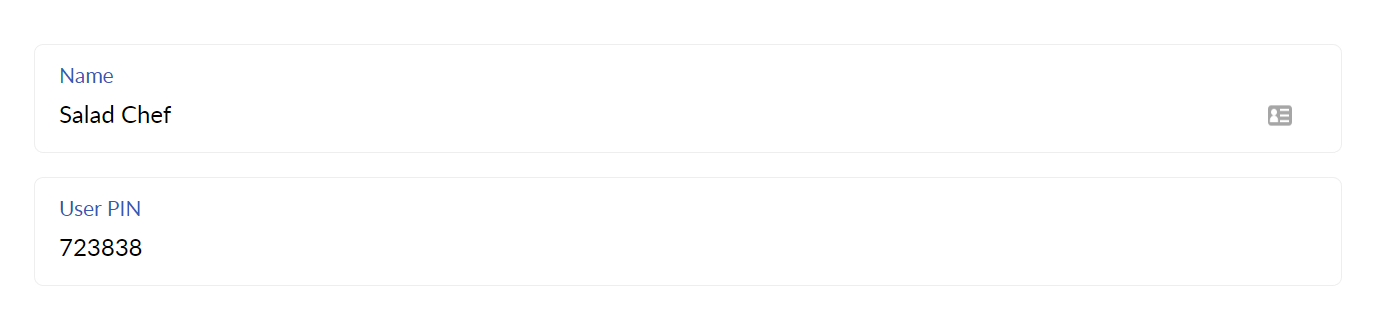
STEP 8. SET YOUR USER PIN CODE
You can edit your user name and email if needed. Also take note of your user’s PIN, as you will need it to log into the Delivety app. You can edit the user’s PIN if needed. Make sure your user is Active and not Suspended.
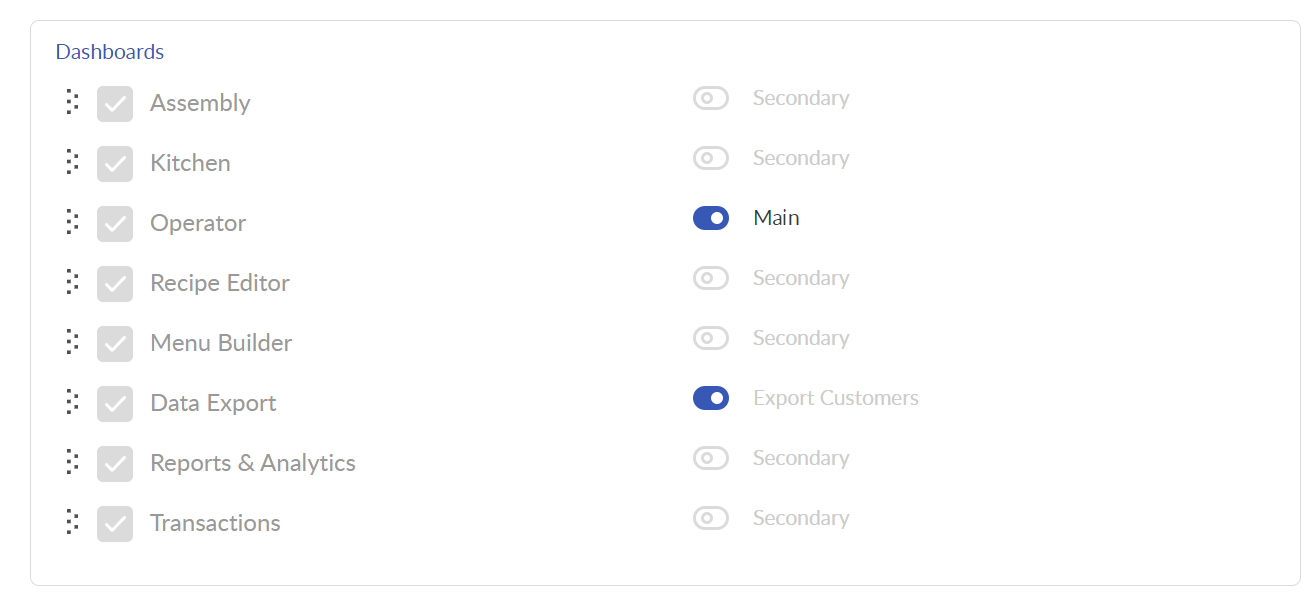
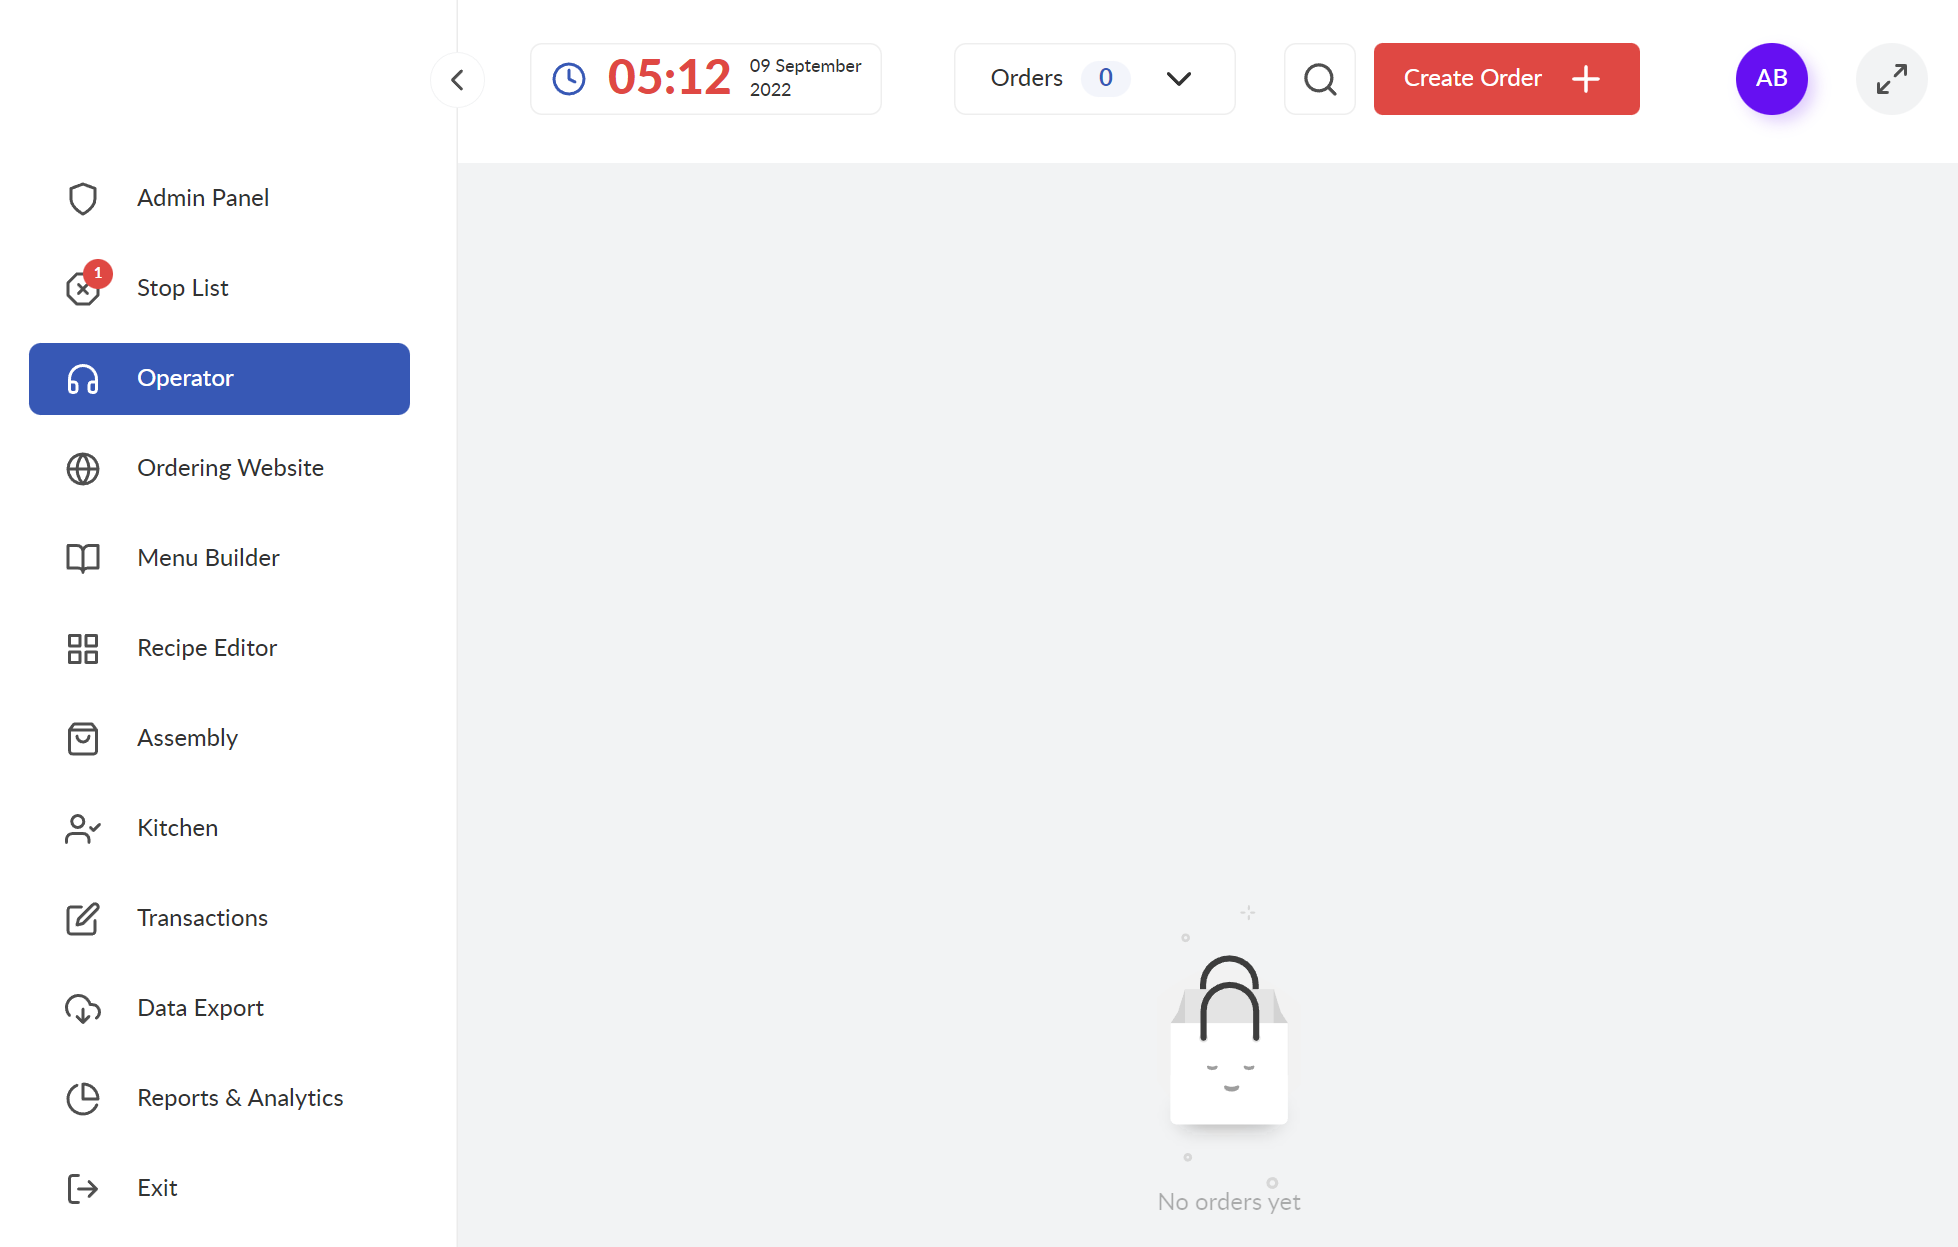
STEP 9. SELECT DASHBOARDS
In your User’s settings, you can select the Dashboards you want to access. We recommend selecting all of them for your user (to get a better understanding of how they work, for instance). Alternatively, you can select only those with the management functionality (Reports & Analytics and Data Export, e.g.) while delegating access to the rest of the dashboards to other users. Any dashboard can be assigned to any number of users, so there are no limits and you can proceed in the best way that suits your business model. Select which dashboard has to appear first when you log into the Delivety app by switching it from Secondary to Main.
STEP 10. NAVIGATE BACK TO USERS
Return back to the Users section to add more users by closing your user tab or selecting Users from the left-side pane. All these settings will be saved automatically.
STEP 11. ADD THE SECOND USER
Click on the Add button left to the Users.

STEP 12. ENTER THE USER NAME
Enter the second user name. The user will have to select it when logging into Delivety. You can also enter the user’s email if needed.

STEP 13. CREATE A PIN CODE FOR THIS USER
Create the user’s PIN and share it with the user, as the PIN is needed to log into the Delivety system. Make sure the user is Active and not Suspended.
STEP 14. ASSIGN THE DASHBOARDS
Select the Dashboards this user will work with.
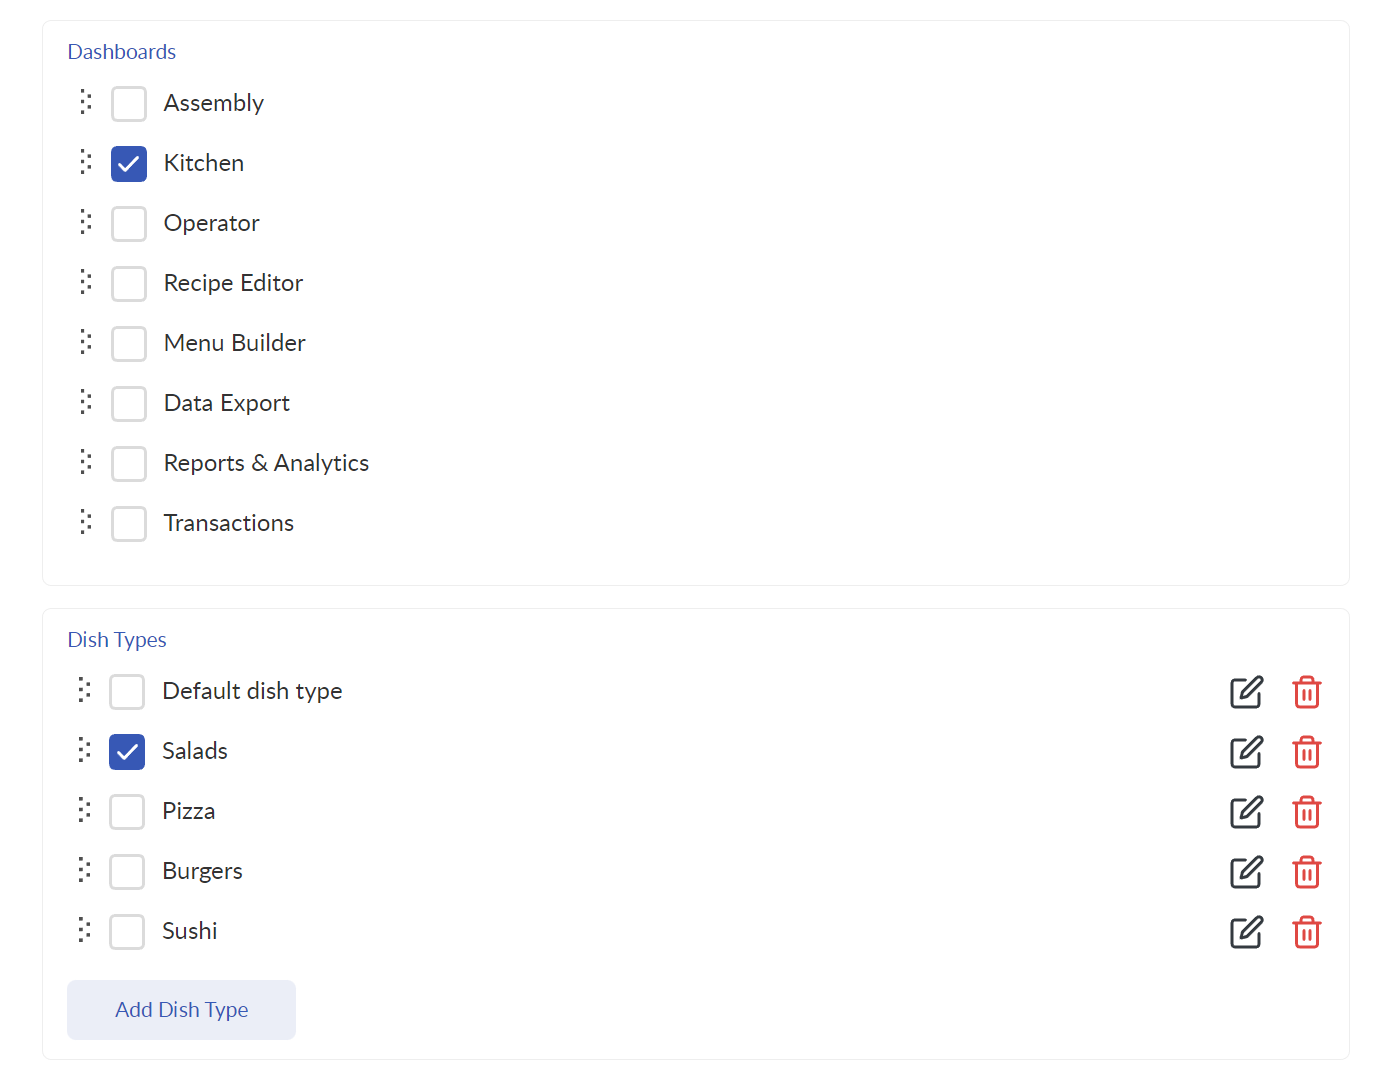
Depending on the user you are creating now, we recommend assigning the following dashboards to the appropriate roles:
Assembly Dashboard to the employee who is responsible for assembling dishes into orders (and, perhaps, passing the assembled orders to couriers as well);
Kitchen Dashboard to your cooks. You will have also to assign (and/or create) Dish Types for them (pizzas to the pizzaiola, sushi to the sushi chef, etc.);
Operator Dashboard to your operator(s) or dispatcher(s);
Recipe Editor to your chef;
Menu Builder to the person who is responsible for creating and/or updating your menu and setting the dish prices;
Data Export to the person who is responsible for exporting your data (sales, money flow, etc,) to ERP. You can allow (or not allow) this person to export your customers’ data;
Reports & Analytics to the person who is responsible for improving operations and/or general management of your delivery business (perhaps, this is you?).
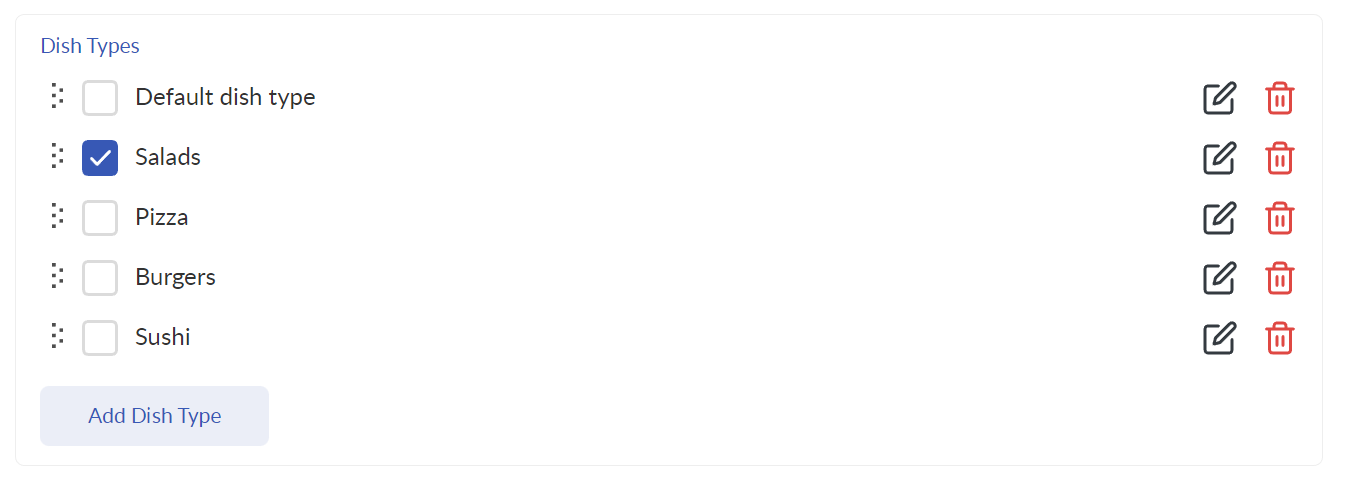
If the Kitchen Dashboard has been selected, you can then select the dish types your user will have access to. Also, you can add more dish types here by clicking on the Add a dish type button. Selected dish types have an impact on the Kitchen Dashboard only by directing ordered dishes to the appropriate cooks (pizzas to the pizzaiola, sushi to the sushi chef, etc.). We recommend adding all of your dish types right now and selecting all of them for your user.
Don’t forget to assign a domain to the user. At the initial setup, your Domain section has to contain one domain only. This domain has been created automatically within your Delivety account setup process. It has to look like your-domain.delivety.com and you have used it to log into your Admin Panel. Should you need more domain names (if you have multiple brands, restaurants, workflows, etc.), you can add them by selecting the Domains from the sidebar on the left. Then you will be able to assign these domains to the appropriate users.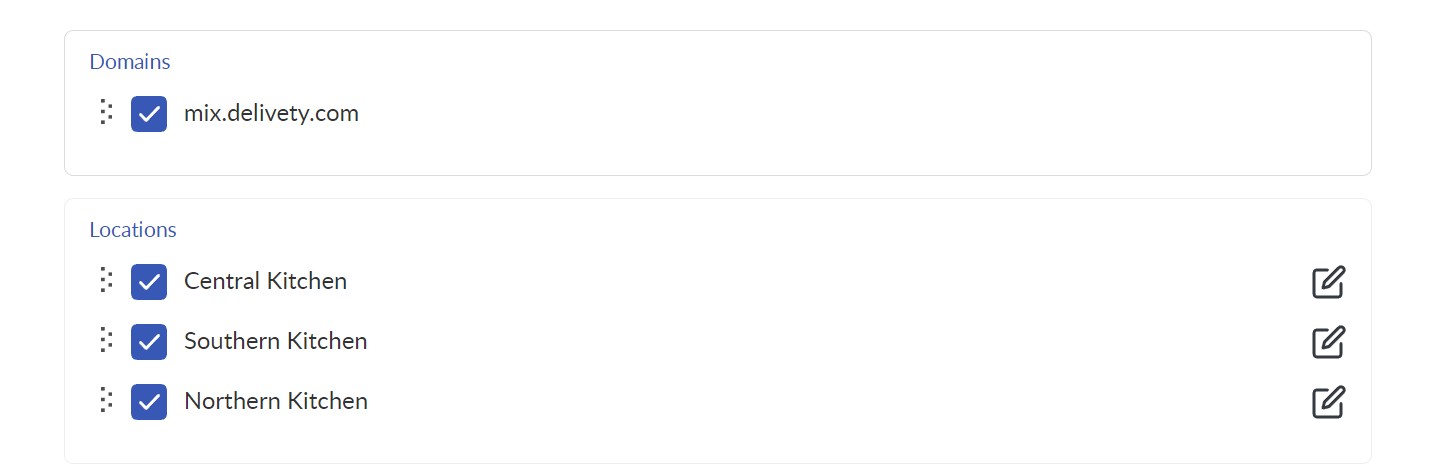
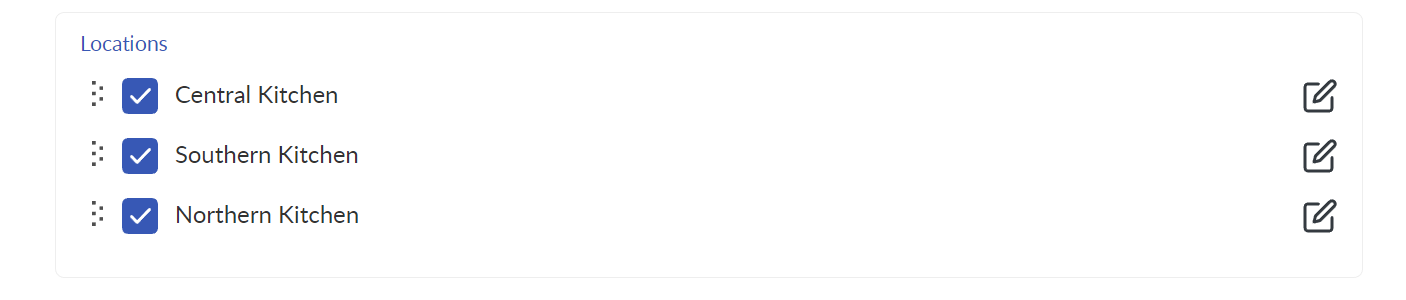
Don’t forget to assign a location to the user. At the initial setup, your Location section contains one location only. This location has been created automatically within your Delivety account setup process. If needed, you can rename it by clicking on the three-dots icon. Should you need more locations (if you have multiple kitchens, restaurants, take-away/pick-up points, etc.), you can add them in the Location section of the sidebar menu on the left.
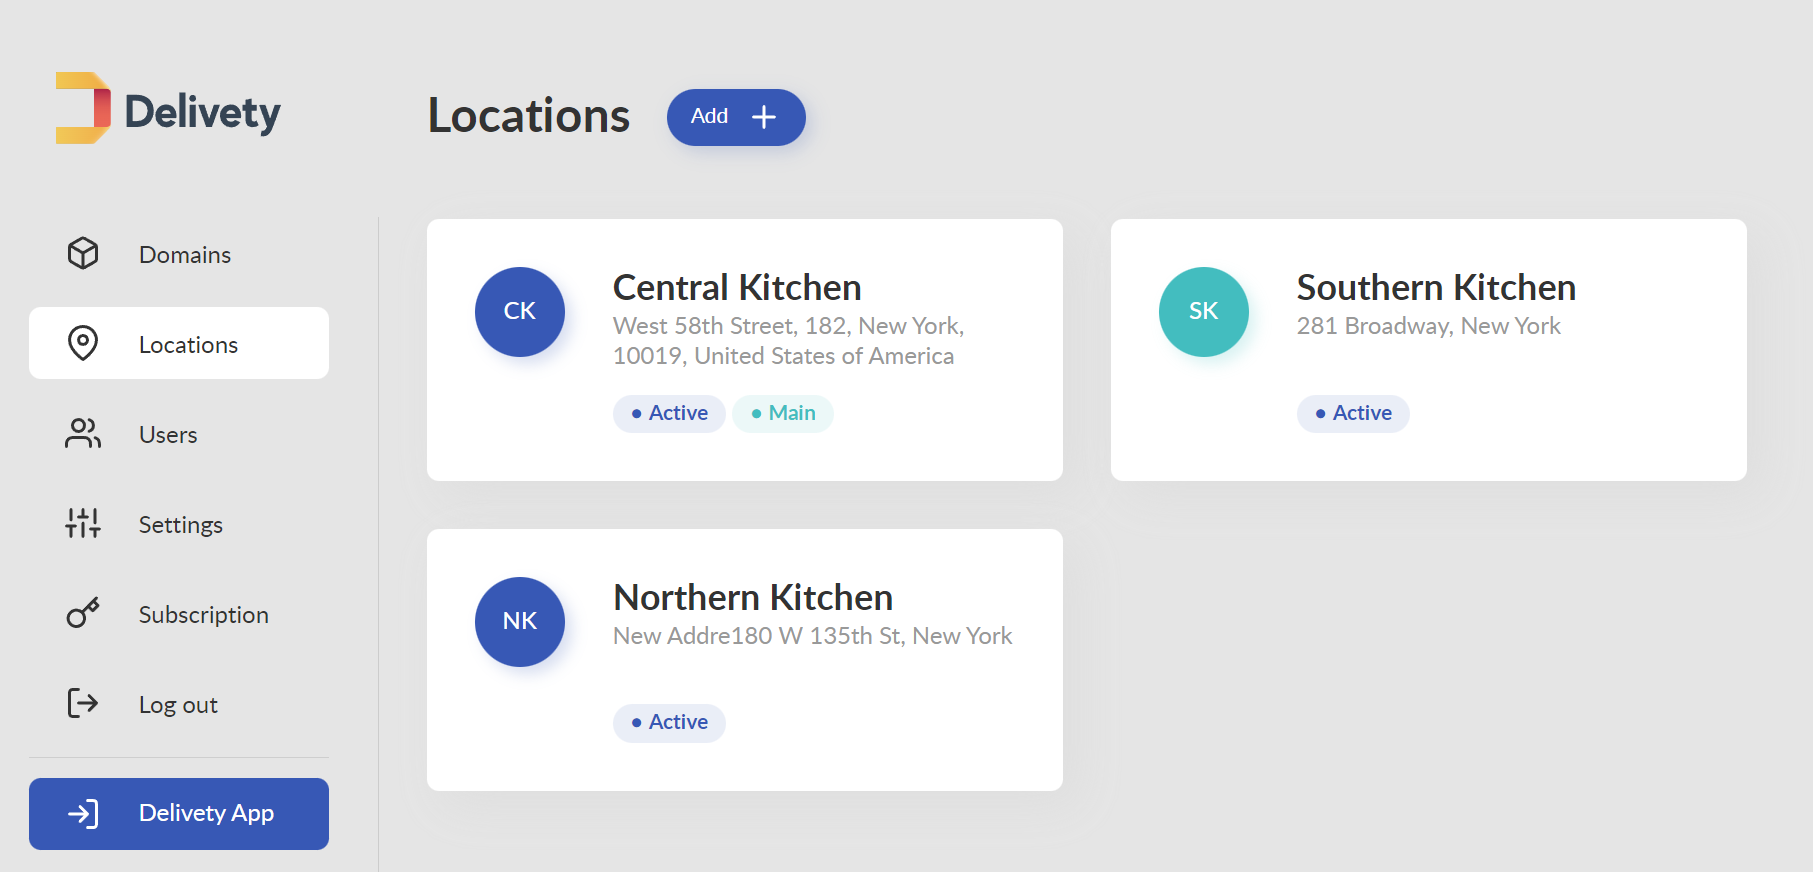
Then you will be able to assign these locations to the appropriate users.
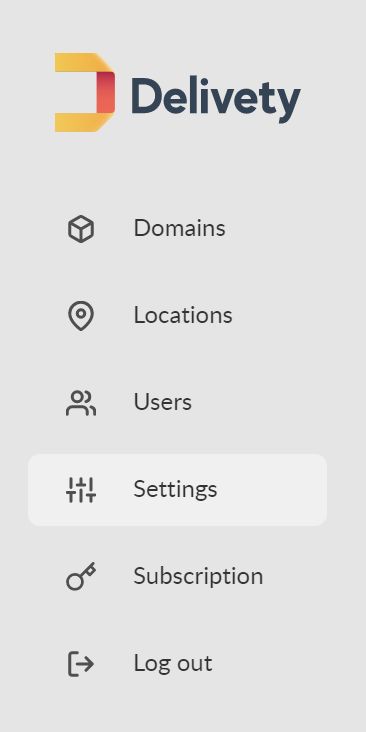
STEP 15. GLOBAL SETTINGS
Select Settings from the sidebar menu on the left, once you have logged into your Admin Panel.
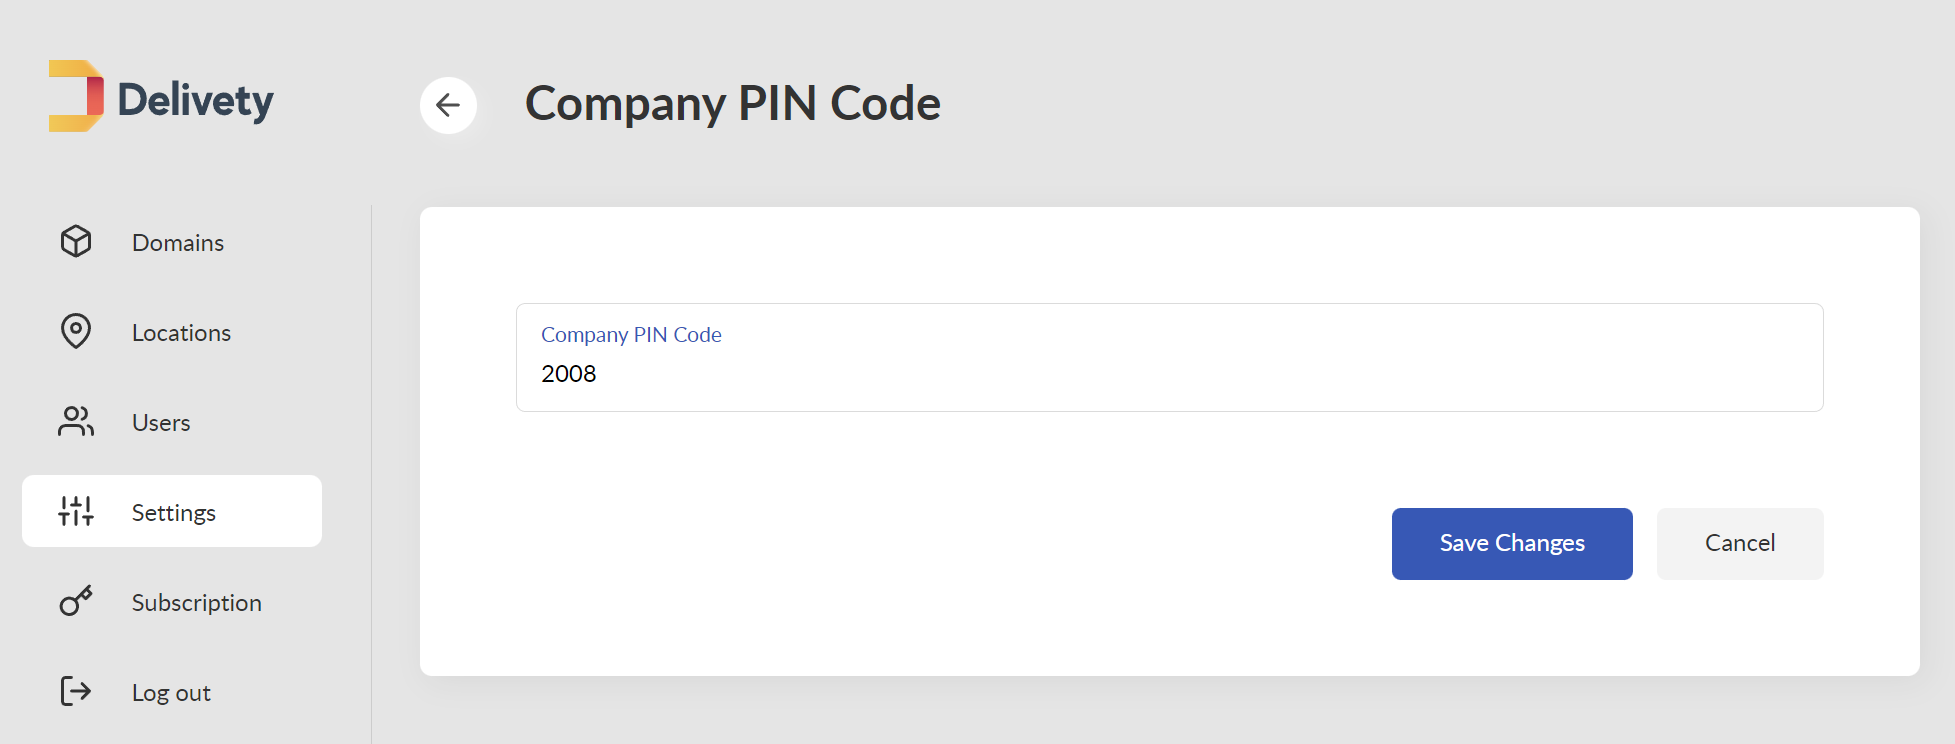
STEP 16. COMPANY PIN CODE
Scroll down to the COMPANY PIN CODE settings and set the PIN code of your choice. Click on the Save PIN code button. You will have to share this PIN code with all of your staff members that will use Delivety.
STEP 17. SCROLL DOWN TO PRINTER / SYSTEM SETTINGS
Watch this video tutorial on how to setup your receipts printer.
Scroll down to PRINTER MANAGER / ADD PRINTER. You can skip this step if you don’t need to print the paper receipts for your customers. You can also set up your printer later.
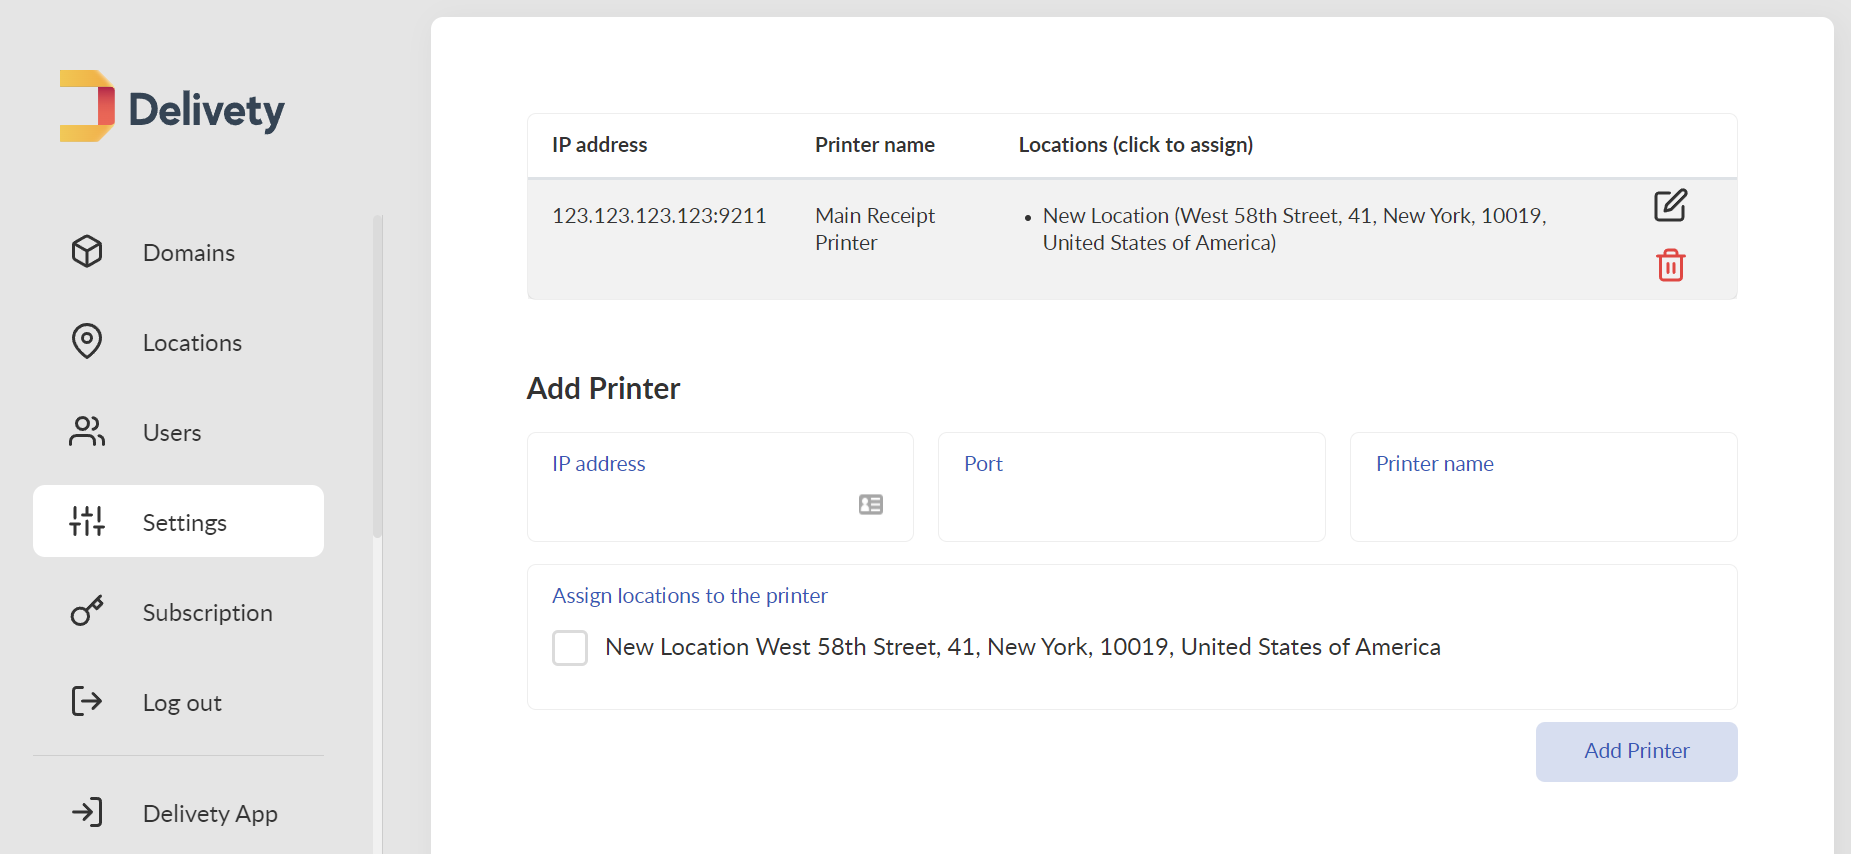
STEP 18. ADD PRINTER’S IP ADDRESS, PORT AND NAME
Enter your printer IP address, port number, and name. Click the Add Printer button. You can find the detailed instructions on printer setup here. You can skip this step if you don’t need to print the paper receipts for your customers. You can also set up your printer later.
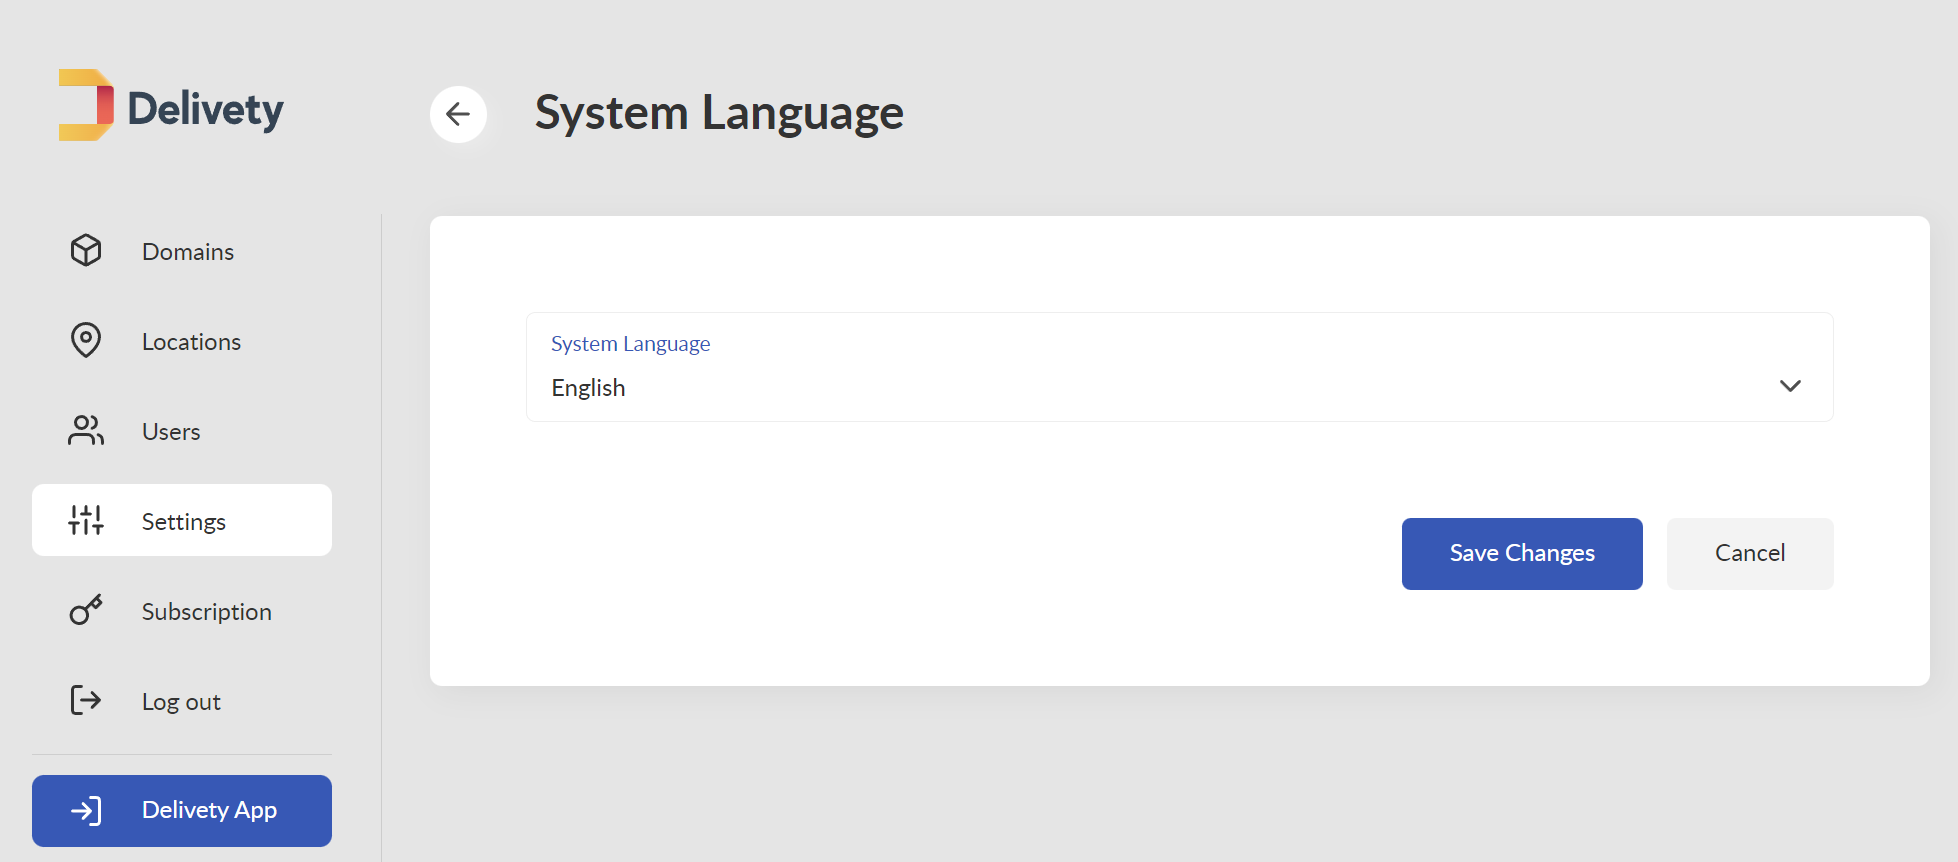
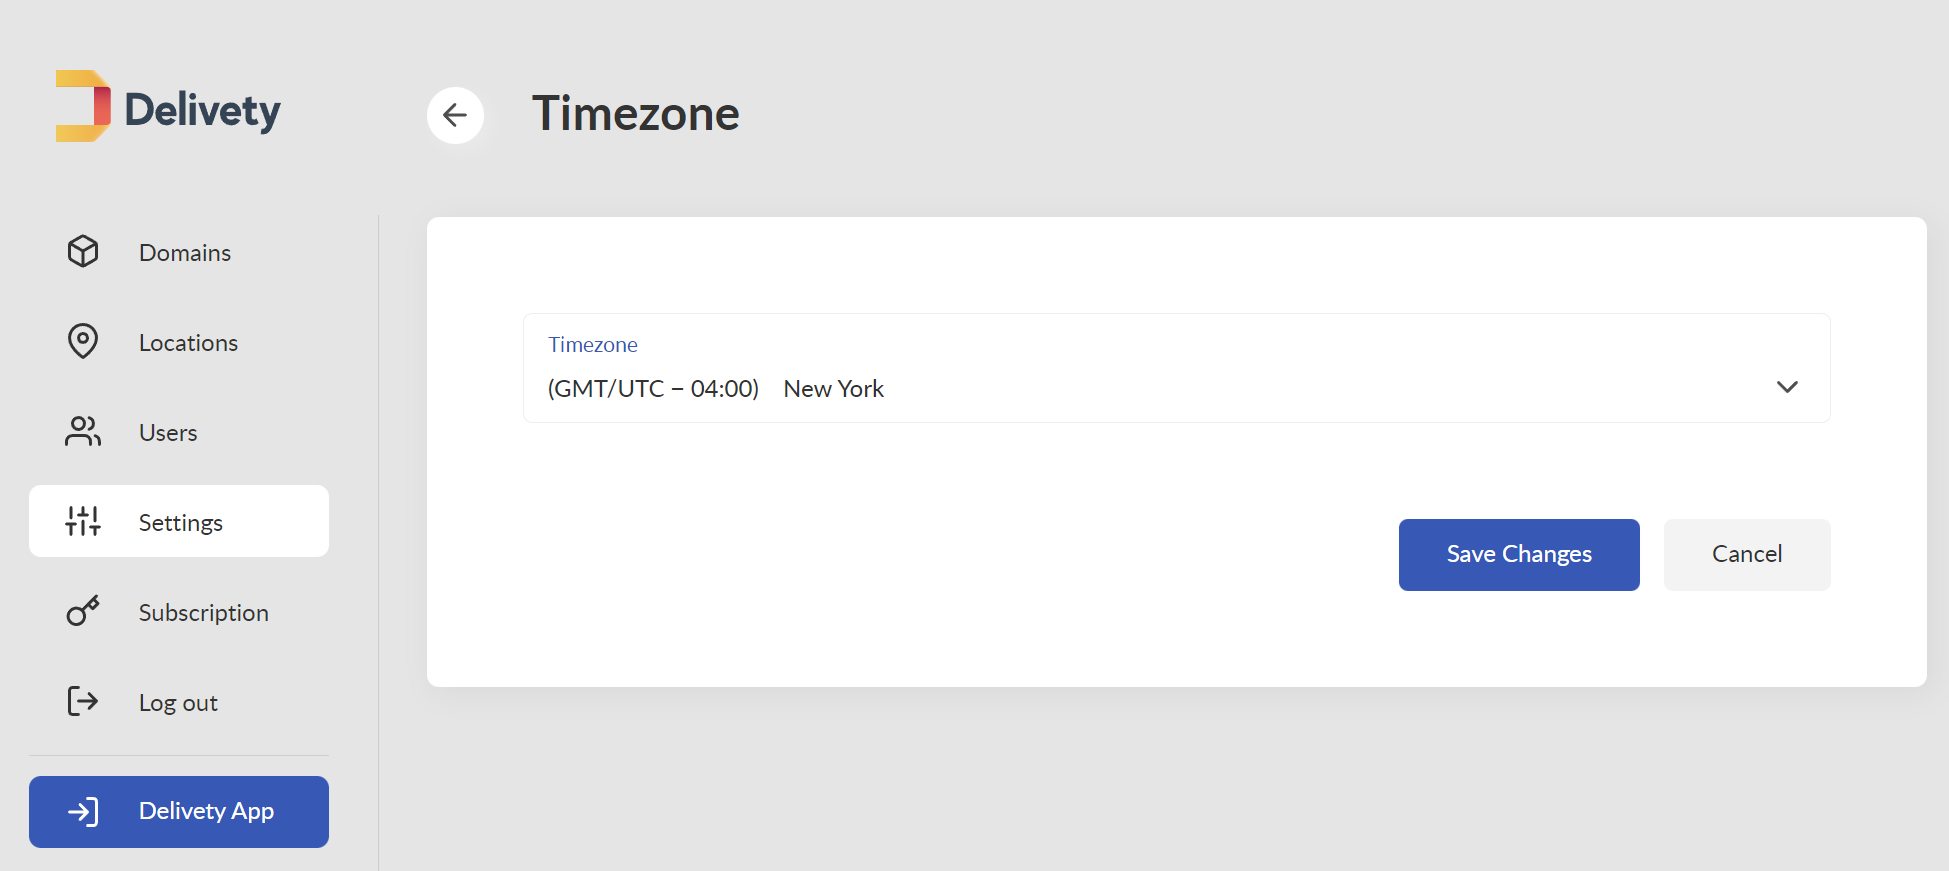
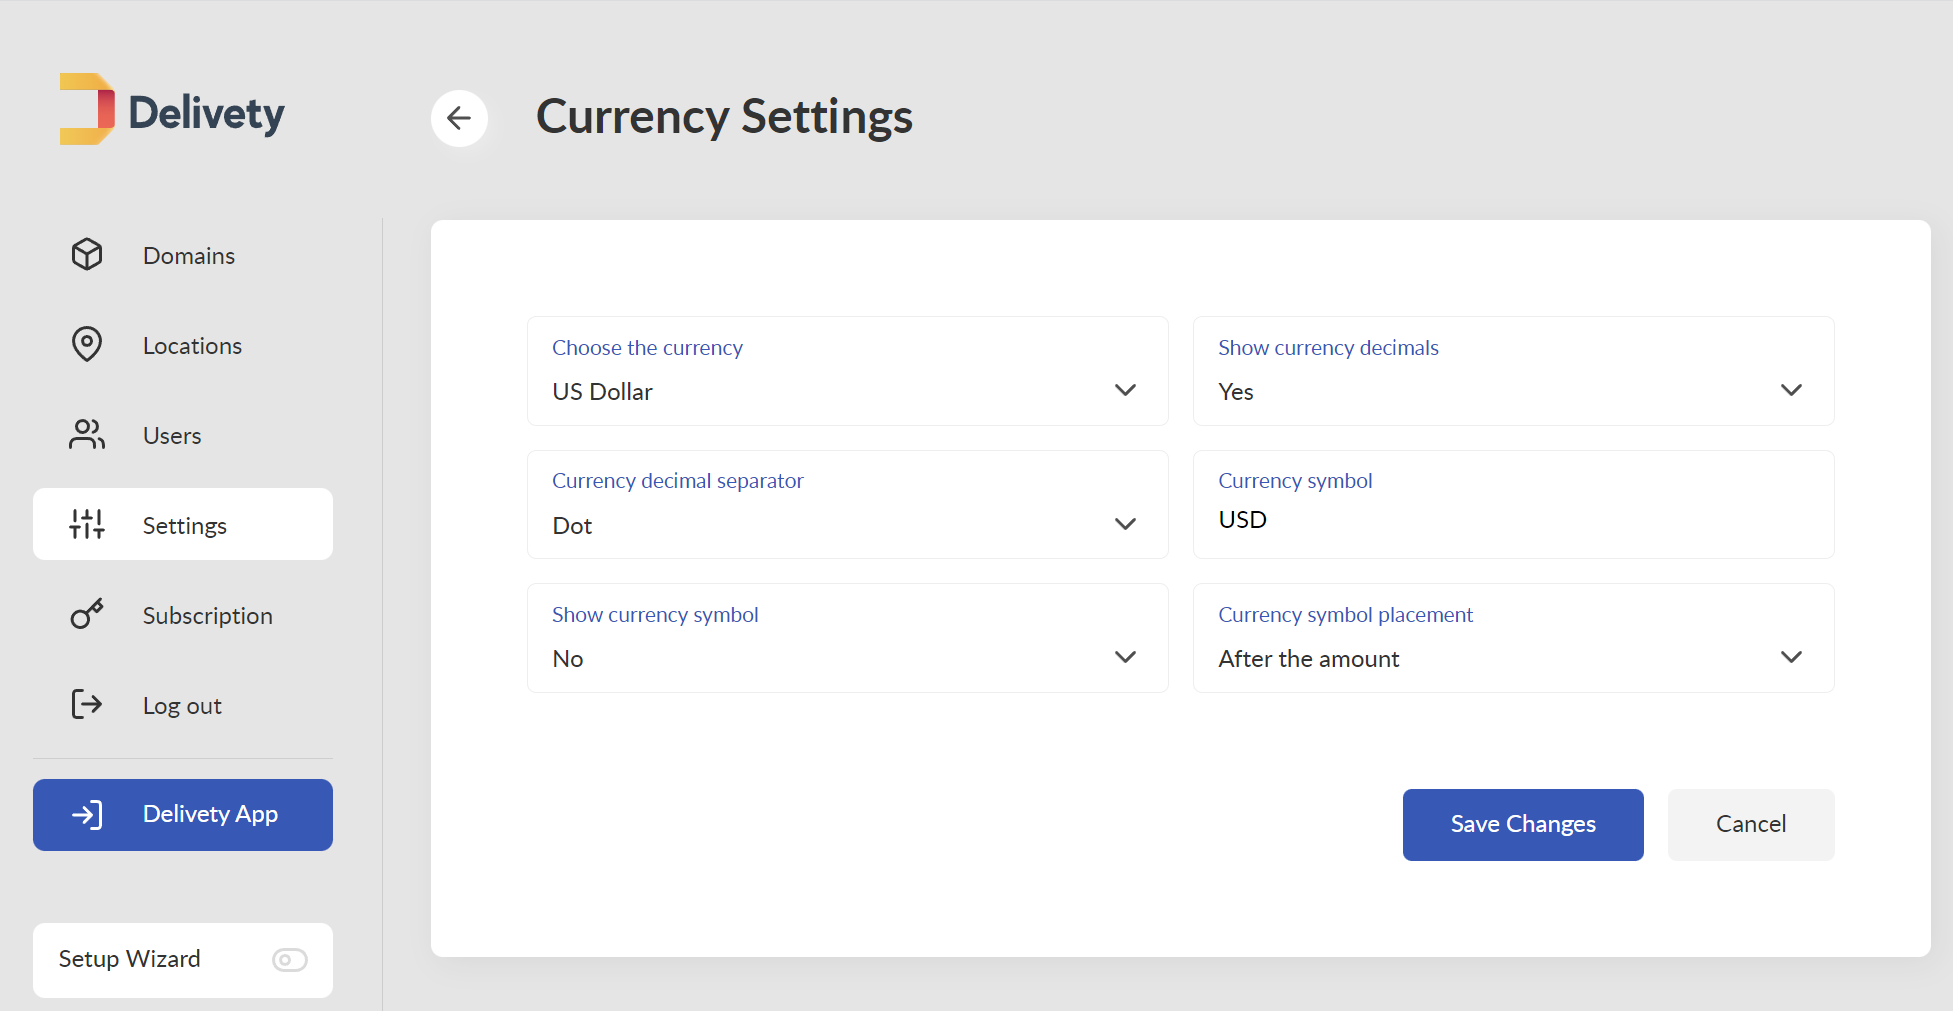
Scroll down to check your system language, time zone, and currency. You can change them to suit your business needs.
STEP 19. NAVIGATE BACK TO THE DOMAIN SETTINGS
Select Domains from the sidebar menu on the left and click on your domain.

STEP 20. CHECK IF THE USERS ARE ABLE TO LOG IN
Click on the Users Login Page link which is located under your domain logo. It’s good practice to check if the users you’ve just created are able to log in before giving them the User Login Page URLs and PIN codes. Also, you can check whether the correct domains, locations, dashboards, and dish types are assigned.
To log into Delivety app, you can also click on the Delivety App from the sidebar on the left. Or, you can log out of the Admin Panel and log into the Delivety app your-domain.delivety.com/app, (replace your-domain with your Delivety domain name). Take note that now there should be /app after delivety.com (not /admin). At first, you will be prompted to enter your Company’s PIN (you have set your Company’s PIN in Step 16 of this guide).
Once the Company’s PIN is entered, you will see the list of your users (or only one user at the initial setup). Select the user and enter the User’s PIN (you have set your User’s PIN in Step 8 of this guide).
Once logged in, you will see your main dashboard (the one you have set as Main in Step 9 of this guide). Also, you will be able to switch between your Dashboards by clicking on your user’s avatar in the upper-right corner of the screen.
Now we recommend you to navigate to your Admin Panel https://delivety.com/admin and create users for all of your employees that will be using Delivety and assign them appropriate Domains, Locations, Dashboards and Dish Types before proceeding to the next steps.
Watch this video tutorial on how to create your kitchen users and distribute your kitchen workflows using Delivety KDS System:
______________
Next Step: Creating Your Menu
Comments
0 comments
Please sign in to leave a comment.