
The Assembly Dashboard is the optional visual interface where a kitchen staff member, who is involved in assembling the dishes into the orders, works with the orders queue and marks the dishes assembled into orders in real-time once they are put into order bags/boxes. The order assembler also provides the Planned Dispatch Time to the operator. Once the order is assembled completely, the receipt can be printed and the order gets the Ready status that means it can be now presented to the couriers for dispatch.
You may opt not to use the Assembly Dashboard if your workflow does not involve the order assembly process. If this is your case, simply do not assign the Assembly Dashboard to any of your users and all the related processes will be skipped automatically. Also, you can tick the "Skip dishes preparation" checkbox in the Advanced Settings of the Admin Panel > Domains section. There will be no need to set the Planned Dispatch Time and the receipts can be printed out of the Operator Dashboard directly.
In order to use the Assembly Dashboard, you have to log into the Delivety App as a user who has the Assembly Dashboard assigned. Log in to the Delivety App using the URL your-domain.delivety.com/app (replace your-domain with your Delivety domain name).
Recommended Devices
The Assembly Dashboard can be used on any PC, Mac, iPad or Android tablet as well as on any iPhone or Android phone. We recommend using a medium-to-large-sized tablet (at least 10 inches) or a simple PC (or a Raspberry Pi) with a middle-sized touch screen to work with the Assembly Dashboard comfortably and effectively. Alternatively, you can use any mobile phone to work with the Assembly Dashboard as it is fully mobile optimized.
User Interface Overview
The Assembly Dashboard consists of four interface elements: Toolbar, Orders Queue, Items Calculator, and Recipe Viewer
The Toolbar is similar to the toolbars of other Delivety Dashboards and consists of the following elements:
The Time & Date Selector allows you to select any other date to view the orders. For instance, you can switch to tomorrow's date to view the orders that your customers have placed for tomorrow. By default, it shows the current time and date when you log in.
The Receipt button prints the order receipt once the order is assembled.
The Full-Screen mode button opens the Assembly Dashboard in the full-screen mode so you will be able to see more orders in the queue.
The Avatar button opens the side panel with the dashboard selector that allows you to switch between the dashboards if you have multiple dashboards assigned.
The Stop List button opens the list of dishes that are temporarily hidden from the menu, for instance, if your kitchen ran out of some ingredients. You can also click on the Stop List button to add some dishes to the stop list if needed.
The Exit button logs your user out of the Delivety dashboard.
The Orders Queue shows today’s orders in a form of cards on the left pane. Once you tap an order, its content opens in the right pane:
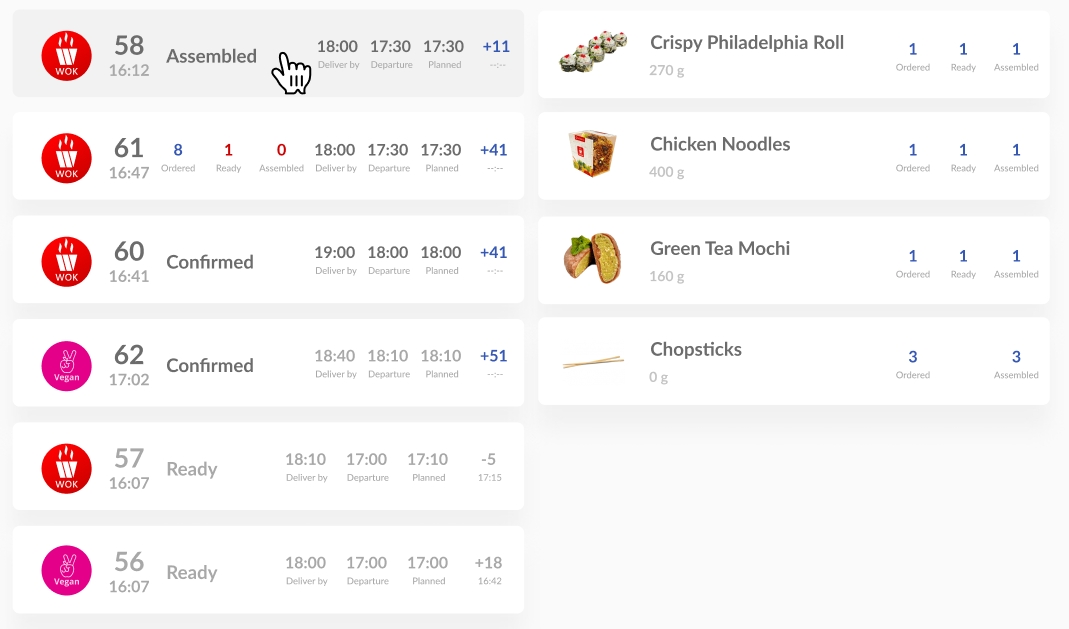
The orders in the Orders Queue are arranged by urgency: more urgent ones show up at the top. Assembled orders become grayed out and move down below the queue.
Each order card provides the following information about its status:
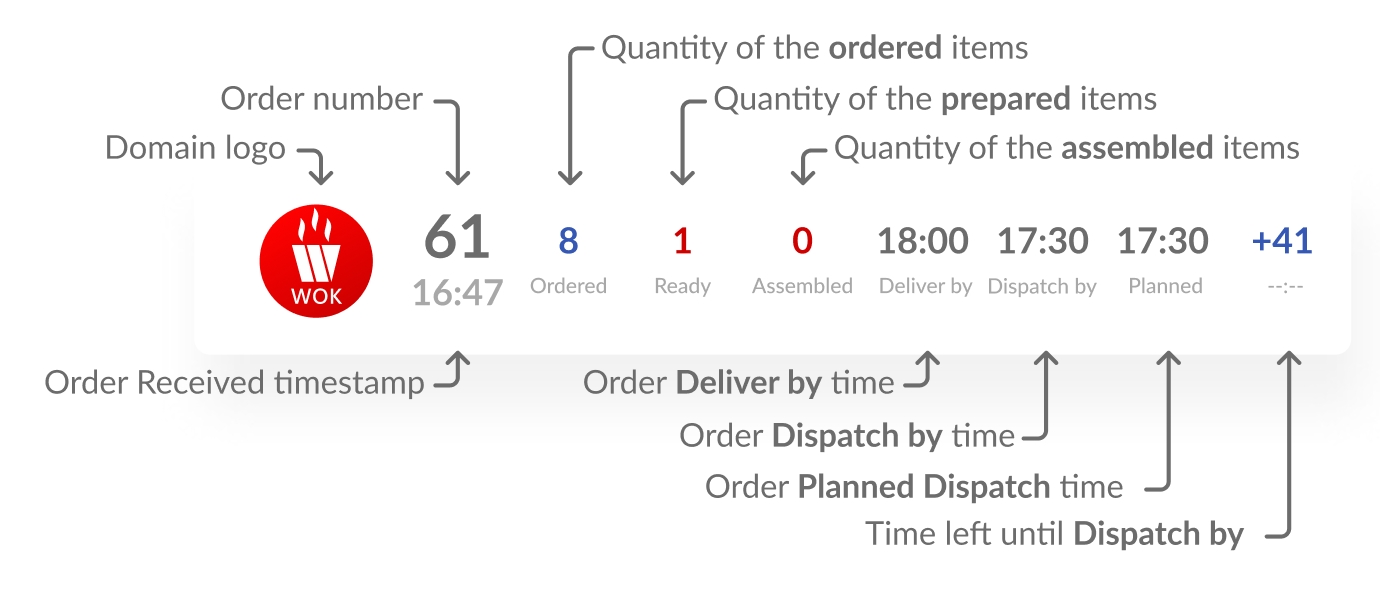
The Domain logo allows you to distinguish the orders of different brands (in case you have a multi-brand kitchen) to use the appropriate brand packaging for the order.
The Order number shows today’s incremental number of the order.
The Order Received timestamp shows the time when the order has been accepted by the system.
The Quantity of the ordered items shows how many dish portions (or any other order items like beverages, disposable cutlery, e.g.) have been ordered.
The Quantity of the prepared items shows how many portions are prepared by the kitchen and are ready to assemble. Any other order items (e.g. beverages, disposable cutlery) that are not being prepared by the kitchen are shown as ready to assemble immediately.
The Quantity of the assembled items shows how many items are assembled already. You can change this value in real-time once you put an item into the order’s bag(s)/box(es) by clicking on the order card and entering the number of the assembled dishes in the Items Calculator.
The order Deliver by time shows until what time the order has to be delivered to the customer.
The order Planned Dispatch time shows the time of estimated order readiness for dispatch that is provided by you as a part of the new order confirmation process (read the Setting Up the “Planned” Time for New Orders paragraph below.
The Time left until Dispatch by shows the time left (in minutes) for all of the items to be assembled and passed to the courier to dispatch. When all the items of the order are assembled, the card is grayed out and this time shows the minutes ahead (or after, if late) of the planned time the order has been assembled.
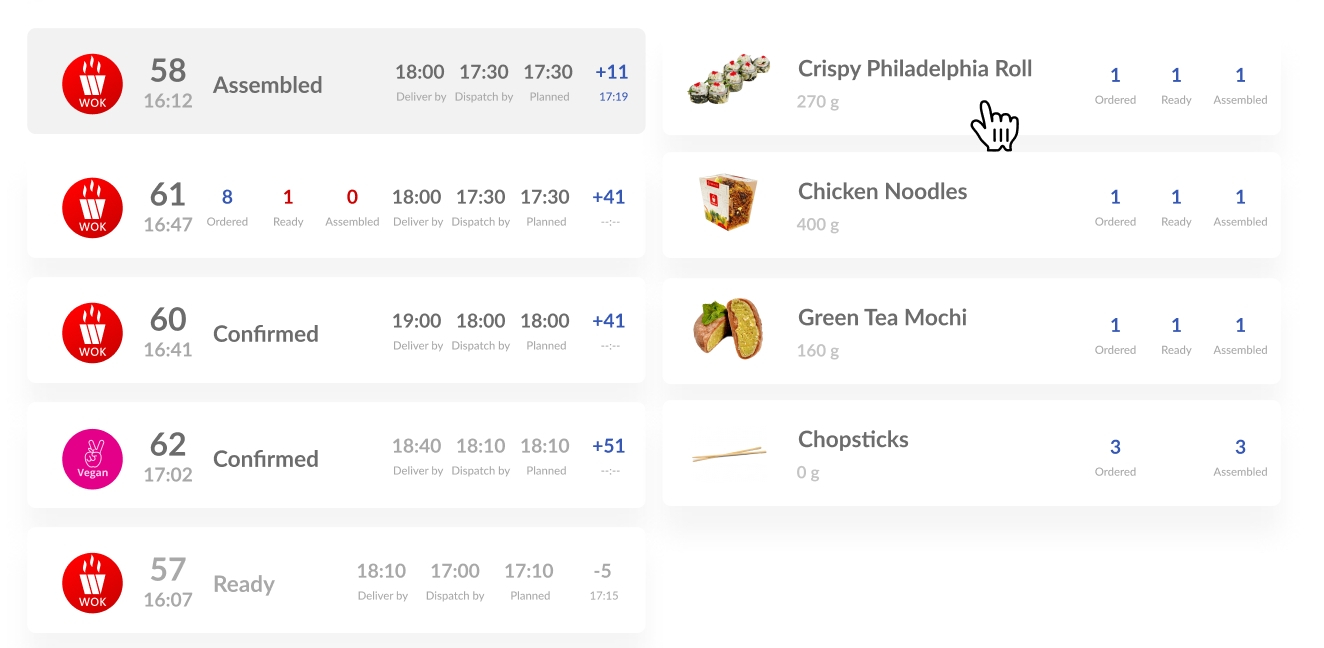
The Items Calculator opens once the order is selected from the left pane and an order item is clicked on from the right pane:
In the Items Calculator, you enter the quantity of the assembled items. In case of a mistake, you can subtract them by clicking on the minus button. The history of items assembly is being recorded to avoid errors.
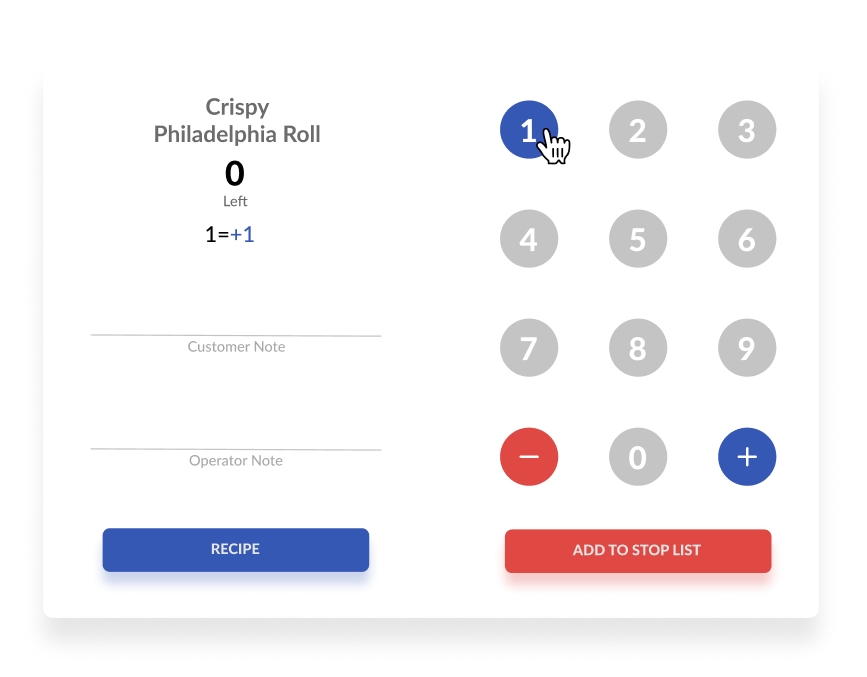
Sometimes your kitchen may run out of some ingredients needed to prepare a dish. In such a case, you can click on the dish card then the Add to Stop List button then the OK button. This hides the dish from the website menu and operator’s menu temporarily. Also, there are two automations on how the dish will be added to the stop list. The first one is to add a dish to the stop list automatically after X dishes are ordered (e.g. when you have buns for 10 burgers left only). The second one is to remove it from the stop list after X hours (you know that the new batch of burger buns will be ready in one hour).
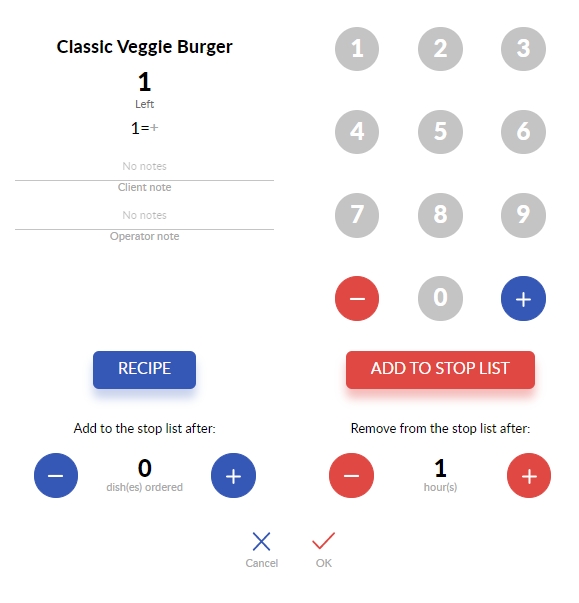
You can view the recipe of the dish (or item) on the Recipe button. The Recipe Viewer opens so you can learn the details of the recipe if needed. This can be useful for the final quality control on the order assembly stage.
In case there are some issues with the recipe (something is not clear enough or missing), you can report it by clicking on the appropriate buttons below the recipe. The chef will see the report in his Recipe Editor Dashboard immediately, alongside the name of the user who reported it to clarify the details and take the relevant actions if needed.
Setting Up the “Planned” Time for New Orders
Once the new order is received, it’s shown in the Assembly Dashboard with the New status. At that moment, you must provide a Planned time to the operator based on the current kitchen workload and delivery time of the order. The Planned time tells the operator when the order will be ready, so the operator can provide the customer with the order’s estimated time of delivery and confirm the order if the customer agrees. You need to tap the new order to set the Planned time. The order gets the Confirmed status as soon as the operator confirms it with the customer and the Dispatch by time will be finalized. The countdown timer to dispatch appears alongside the quantities of the ordered, prepared, and assembled dishes.
Printing Order’s Receipt
Once you complete assembling the order, it receives the Assembled status, the Receipt button on the top turns active and you can press it to print the order’s receipt. The button turns active only if all the items are assembled. This prevents missing any items and makes sure that only the fully assembled orders are dispatched. Now, you can staple the receipt to the order bag and pass it to the courier.
Frequently Asked Questions
How to enable the Full-screen mode
How to provide the Planned Dispatch Time to the operator from the Assembly Dashboard
How to “assemble” dishes in the orders using the Assembly Dashboard
How the kitchen staff can view the dish recipes
Comments
0 comments
Please sign in to leave a comment.